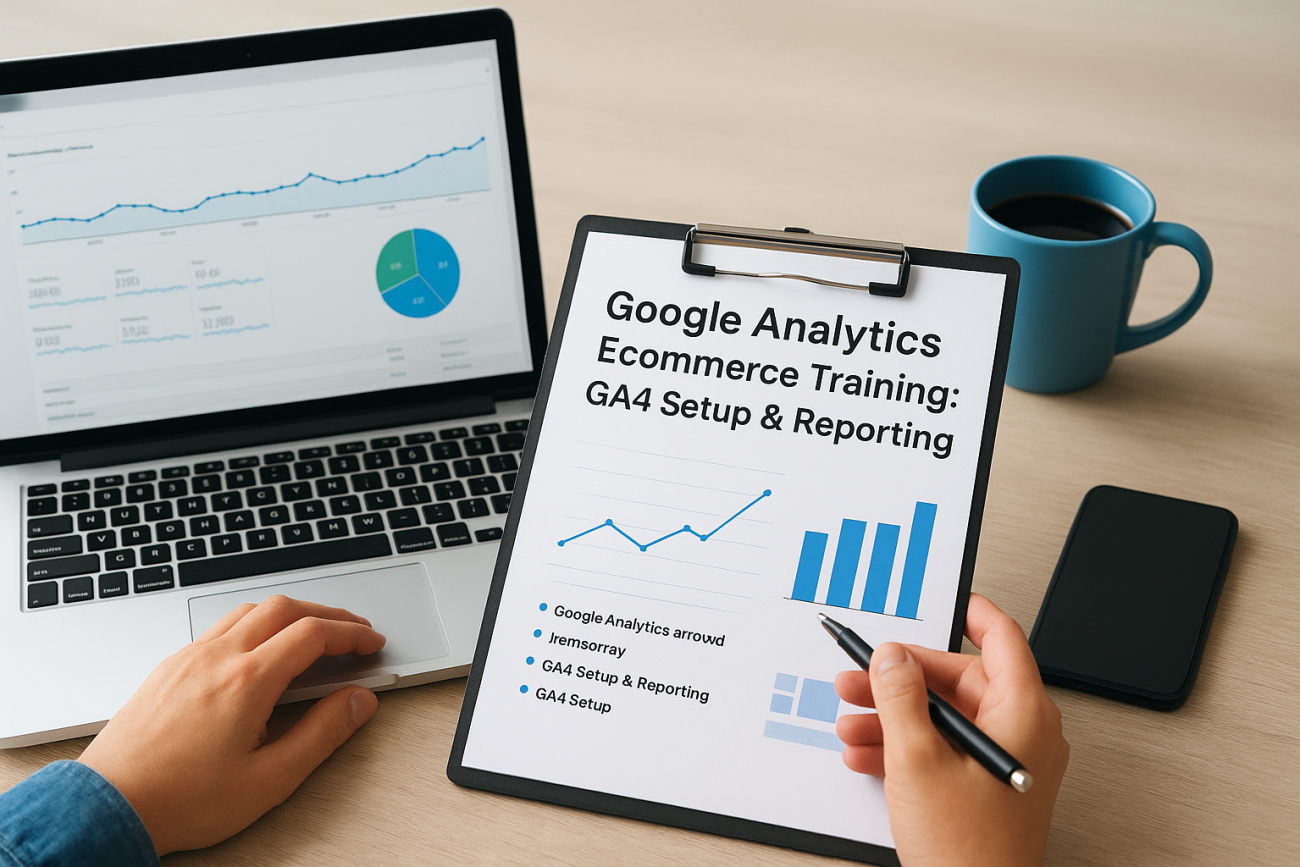
You’re selling courses through your LMS, running promotions, maybe even offering seat licenses to other businesses, but do you actually know which efforts drive revenue? That’s where Google Analytics ecommerce training becomes essential. Without proper tracking in GA4, you’re making decisions based on gut feeling instead of real purchase and revenue data.
GA4 handles ecommerce tracking differently than Universal Analytics did. The event-based model gives you more flexibility, but it also means setup isn’t as straightforward as flipping a switch. You need to configure specific events, pass the right parameters, and build reports that actually tell you something useful. Skip a step, and your data ends up incomplete, or worse, misleading.
This guide walks you through the entire process: from enabling ecommerce events in GA4 to building custom reports that show exactly how your training products perform. Whether you’re tracking course purchases, analyzing checkout drop-off, or measuring revenue by traffic source, you’ll find the technical steps and practical context to get it done right.
At Atrixware, our Axis LMS includes built-in ecommerce for selling training to individuals and organizations. We’ve seen firsthand how proper analytics tracking transforms the way businesses optimize their course sales. This guide reflects that hands-on experience, so you can connect your LMS storefront to GA4 and start making data-driven decisions about your training business.
How GA4 ecommerce tracking works
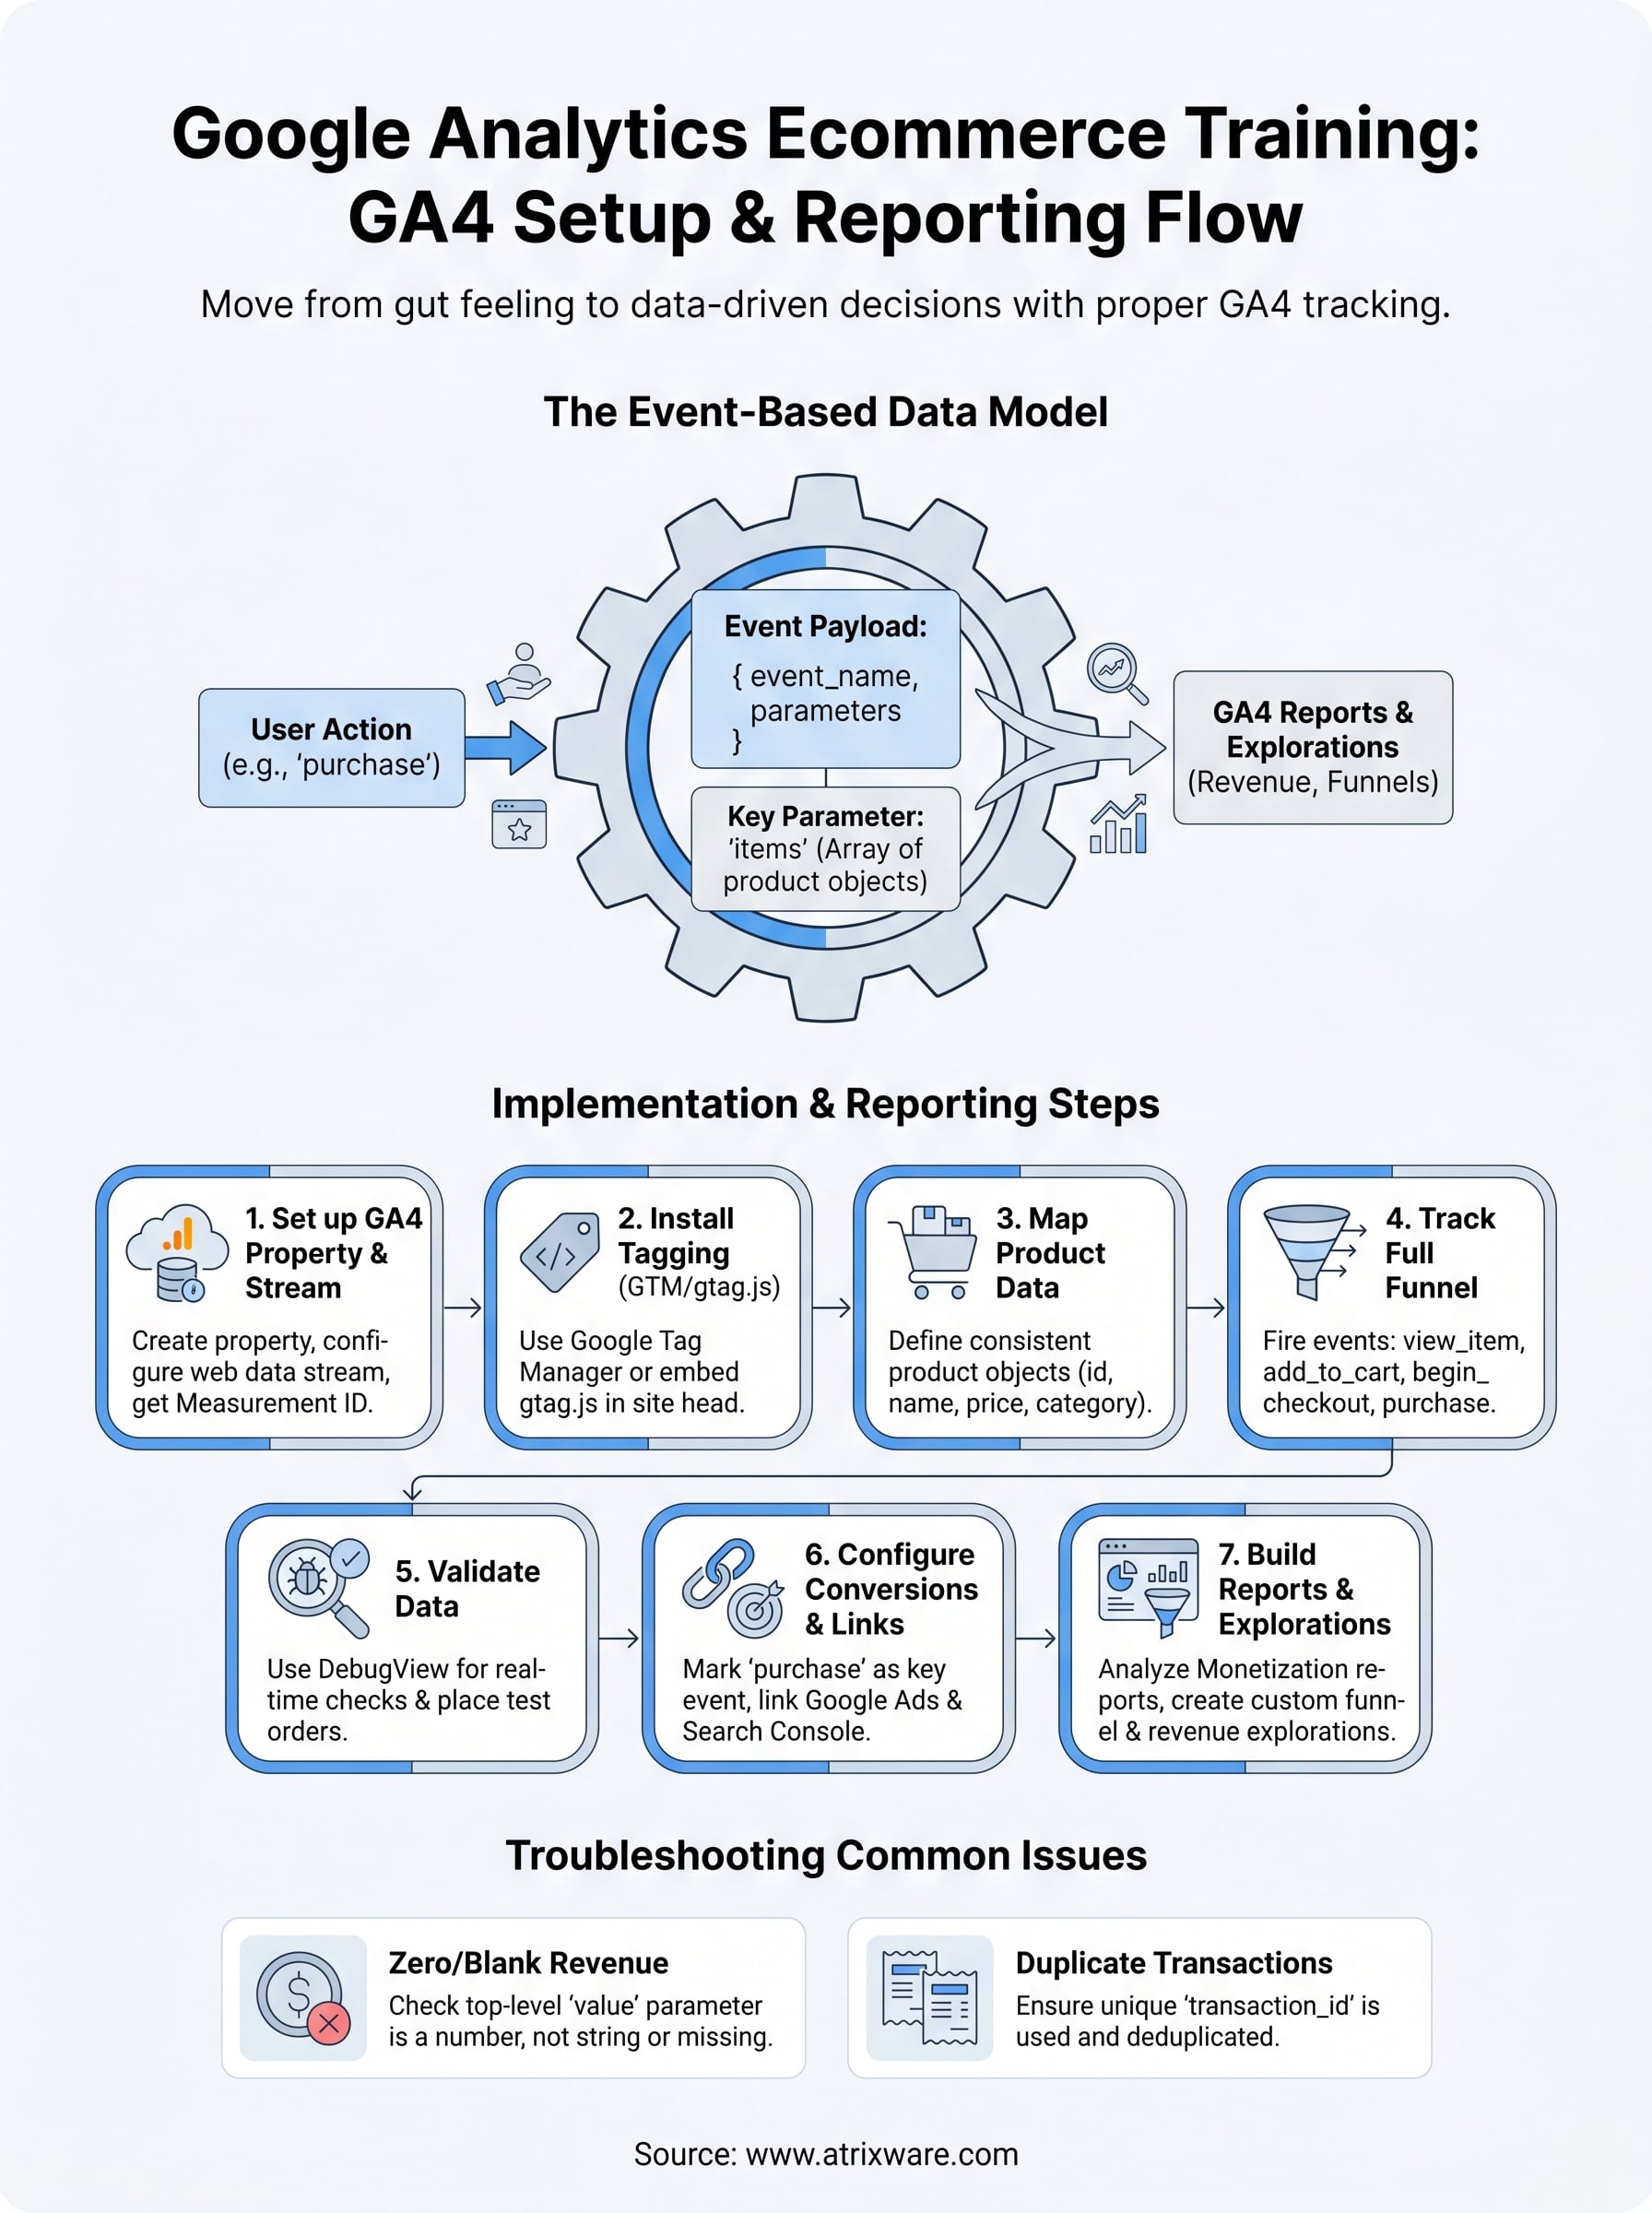
GA4 replaced Universal Analytics’s page-view and session-based model with a fully event-driven architecture. Every interaction on your site, including product views, add-to-cart clicks, and completed purchases, gets recorded as an individual event. For ecommerce, this means you’re not just tracking that a purchase happened. You’re capturing a structured set of data about exactly what was purchased, at what price, and in what context, all tied to a single event payload.
The event-based data model
In GA4, an event is simply a named action paired with a set of parameters. When you complete a google analytics ecommerce training setup correctly, you send events like purchase or add_to_cart along with parameters that describe the transaction in detail. GA4 doesn’t infer ecommerce data from page URLs or goals the way Universal Analytics did, so if you don’t explicitly send these structured parameters, GA4 never receives them.
If your implementation sends the event name but skips the required parameters, GA4 will record the event but show blank or zero values in all ecommerce reports.
Parameters are key-value pairs attached to each event. For ecommerce, the most critical parameter is items, which is an array of product objects. Each product object inside that array describes one item in the transaction, covering fields like item_id, item_name, price, quantity, and item_category. GA4 reads this array and populates every ecommerce dimension and metric you see in reports.
Core ecommerce events GA4 recognizes
GA4 has a defined set of recommended ecommerce events that map to standard stages in a shopping journey. Using these exact event names is important because GA4 only populates its built-in ecommerce reports when it recognizes these specific names.
| Event name | When to fire it |
|---|---|
view_item_list |
User sees a list of products or courses |
select_item |
User clicks a specific product from a list |
view_item |
User views a product detail page |
add_to_cart |
User adds an item to the cart |
view_cart |
User opens the cart |
begin_checkout |
User starts the checkout process |
add_payment_info |
User submits payment details |
purchase |
Order is completed successfully |
refund |
A transaction is reversed |
How parameters carry product data
Each ecommerce event passes an items array containing one or more product objects. Here is what a minimal purchase event payload looks like:
gtag("event", "purchase", {
  transaction_id: "T-12345",
  value: 199.00,
  currency: "USD",
  items: [
    {
      item_id: "COURSE-001",
      item_name: "Compliance Training Bundle",
      price: 199.00,
      quantity: 1,
      item_category: "Compliance"
    }
  ]
});
The transaction_id field prevents duplicate purchase events if a user reloads the confirmation page, because GA4 deduplicates by this value. The value field at the top level drives the revenue metrics you see in reports, so it must match the sum of all item prices multiplied by their quantities. Missing or mismatched values here are one of the most common reasons ecommerce revenue looks wrong in GA4 dashboards.
What you need before you start
Before you write a single line of tracking code, you need to confirm that the right pieces are in place. Jumping straight into google analytics ecommerce training implementation without checking your prerequisites leads to wasted setup time, broken data, and debugging sessions that could have been avoided. Run through these requirements first so your configuration goes smoothly from the beginning.
A GA4 property with the correct permissions
You need Editor or Administrator access to the GA4 property you plan to configure. Viewer-level access won’t let you create data streams, enable ecommerce settings, or set up conversions. If you’re working inside an organization’s account, confirm with your account owner that your Google account has the right role assigned inside the GA4 Admin panel before you start.
If you’re starting fresh, create a new GA4 property rather than modifying an existing one mid-funnel, since changes to an active property can disrupt historical data continuity.
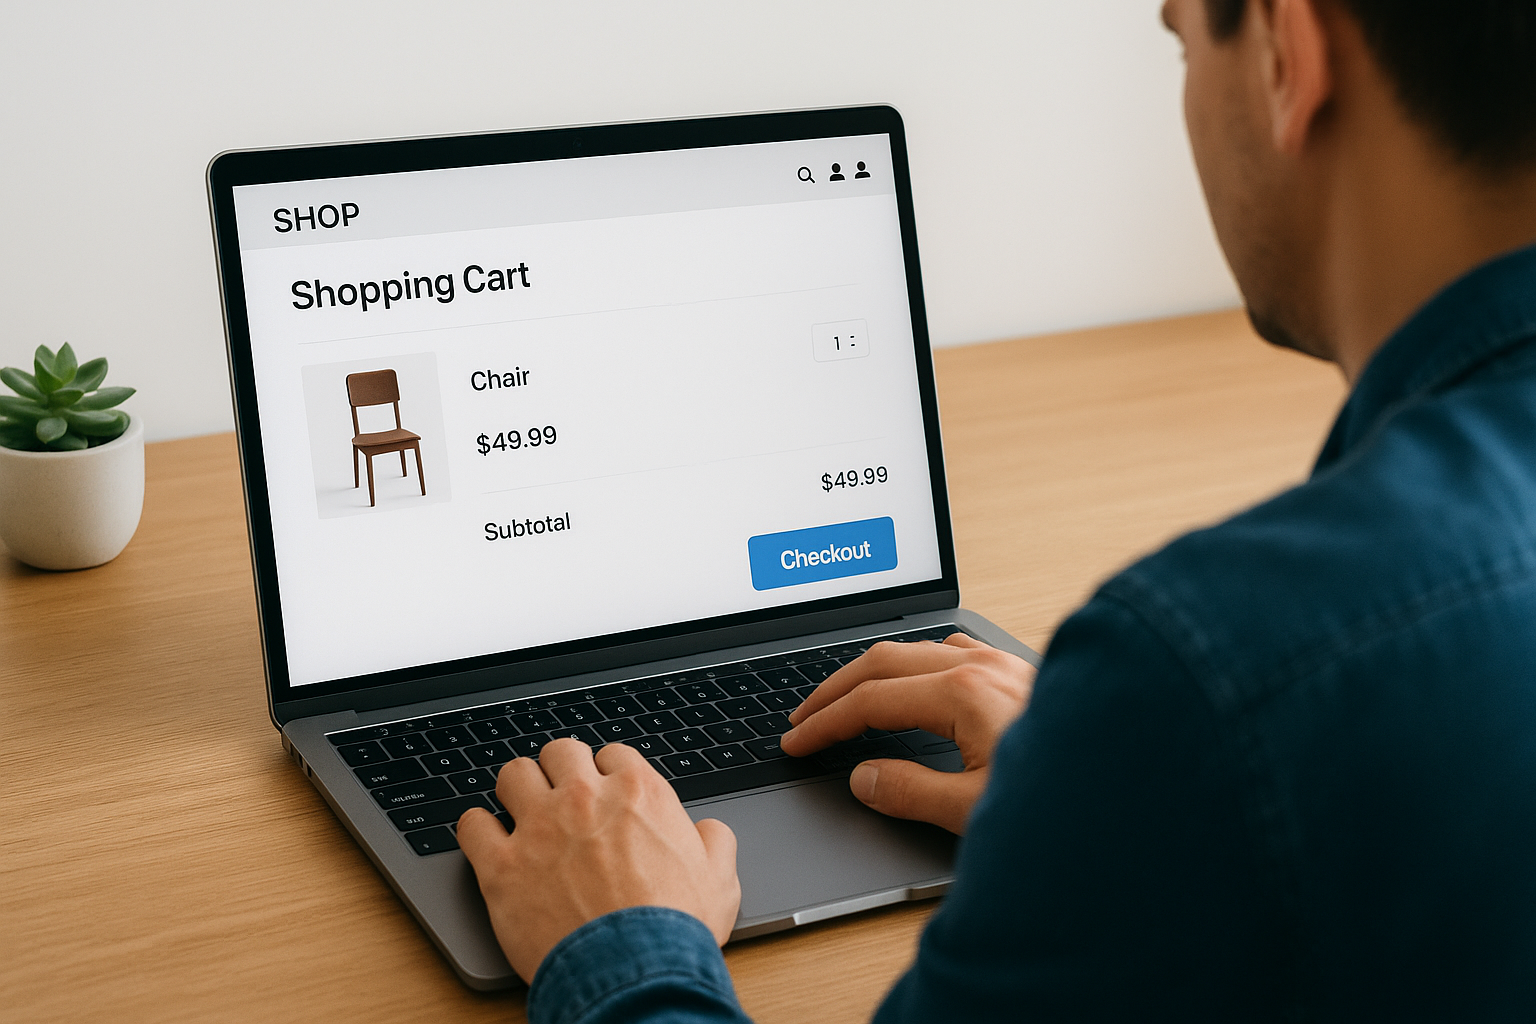
A functioning checkout flow to track
GA4 ecommerce events need real pages and real interactions to fire against. You need a working product catalog, cart, and checkout sequence that you can navigate and test in a browser. If you sell training through an LMS like Axis LMS, map out each step in your checkout: the course listing page, the course detail page, the cart, and the order confirmation page. Write these down because you’ll fire specific GA4 events on each one.
Here’s a simple mapping template to complete before you build anything:
| Checkout stage | Page or trigger | GA4 event to fire |
|---|---|---|
| Course listing | /courses |
view_item_list |
| Course detail | /courses/course-name |
view_item |
| Add to cart | Cart button click | add_to_cart |
| Checkout start | /checkout |
begin_checkout |
| Order confirmed | /order-confirmation |
purchase |
Developer access or a tag manager account
You need either direct access to your site’s source code or an active Google Tag Manager container linked to your site. Both methods work, but GTM gives you more flexibility to update tags without deploying code changes. Confirm that GTM is already installed by checking for the container snippet in your site’s <head> tag, or ask your developer to verify it before your next session.
Step 1. Set up your GA4 property and data stream
Every google analytics ecommerce training setup starts in the same place: a properly configured GA4 property linked to the correct data stream. Without this foundation, no ecommerce data reaches Google Analytics, regardless of how well your event code is written. Follow these steps to get the property and stream in place before you touch anything else.
Create your GA4 property
Log into Google Analytics and click Admin in the bottom-left corner. Under the Account column, confirm you’re working in the right account. Then, in the Property column, click Create Property. Give your property a clear, descriptive name (for example, "Axis LMS Store – Production"), select your reporting time zone and currency, and click Next. Choose "Web" as your platform when prompted. GA4 will automatically create your first data stream setup prompt at this stage.
If you manage training for multiple brands or regions, create a separate GA4 property for each one rather than combining them, so your revenue data stays clean and attributable.
Add and configure your web data stream
After creating the property, GA4 prompts you to set up a web data stream immediately. Enter your full site URL and give the stream a name that matches your environment (for example, "LMS Storefront – Production"). Leave Enhanced Measurement enabled, but note that Enhanced Measurement does not automatically capture ecommerce events. It handles scroll depth, outbound clicks, and file downloads, but the purchase, add_to_cart, and related events require the manual implementation you’ll complete in later steps.
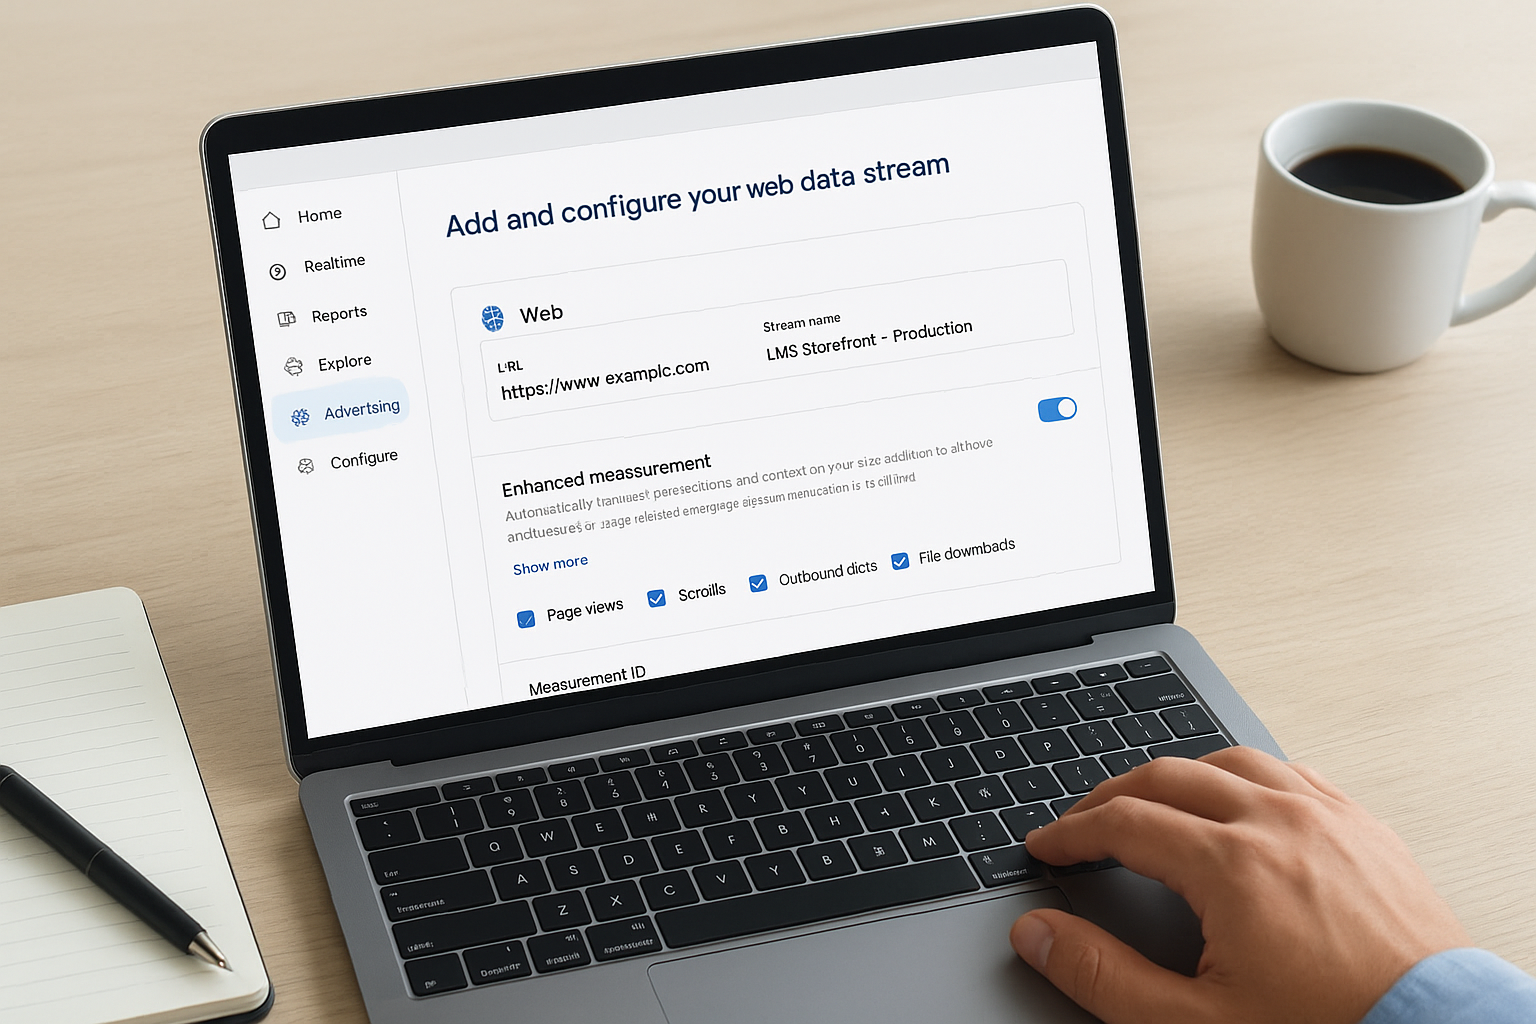
Once the stream is created, copy your Measurement ID, which looks like G-XXXXXXXXXX. You’ll use this ID in every tagging method covered in the steps ahead. Keep it accessible throughout your setup process.
Here’s a quick reference for the key fields you’ll configure during property and stream creation:
| Field | What to enter |
|---|---|
| Property name | Brand or store name + environment |
| Time zone | Your primary market’s local time zone |
| Currency | USD (or your billing currency) |
| Stream URL | Full URL including https:// |
| Measurement ID | Copy and save immediately |
Step 2. Install tagging with GTM or gtag.js
With your GA4 property and data stream ready, you need to get the GA4 tracking code onto your site so events can actually reach your property. You have two reliable paths: Google Tag Manager (GTM) or the gtag.js library installed directly in your page’s HTML. Both work for a complete google analytics ecommerce training implementation, but they suit different workflows. GTM gives you flexibility without repeated code deployments, while direct gtag.js works well if you have full control over your site’s source code and prefer to keep everything in one place.
Install via Google Tag Manager
GTM handles the GA4 connection through a built-in tag template, which means you don’t need to edit your site’s HTML every time you add or change a tag. Log into Google Tag Manager, open your container, and click New Tag. Select "Google Tag" from the tag type list, then paste your Measurement ID (the G-XXXXXXXXXX value from your data stream) into the Tag ID field. Set the trigger to "All Pages" so the base configuration tag fires on every page load. Publish the container when done.
Confirm GTM is already installed on your site before creating tags. If the GTM container snippet is missing from your
<head>tag, no tags will fire regardless of how correctly they are configured inside GTM.
Once the Google Tag fires, GA4 begins receiving page_view events. You still need additional tags for each ecommerce event, which you’ll configure in later steps using Custom HTML tags or the GA4 Event tag type paired with specific triggers.
Install via gtag.js directly
If you skip GTM and install gtag.js directly, paste the following snippet into the <head> tag of every page on your site, replacing G-XXXXXXXXXX with your actual Measurement ID:
<script async src="https://www.googletagmanager.com/gtag/js?id=G-XXXXXXXXXX"></script>
<script>
  window.dataLayer = window.dataLayer || [];
  function gtag(){dataLayer.push(arguments);}
  gtag('js', new Date());
  gtag('config', 'G-XXXXXXXXXX');
</script>
After placing this snippet, you call gtag("event", ...) directly in your page-level JavaScript to send ecommerce events. This approach requires a new code deployment each time you update tracking logic, so coordinate with your developer to plan those releases in advance.
Step 3. Map products, promotions, and lists
Before you fire a single event, you need to decide exactly what data each product object will carry. This mapping step is where most google analytics ecommerce training setups either succeed or fall apart. If your product objects are inconsistent, using different field names for the same course, missing price values, or mismatched item IDs across events, your GA4 reports will show fragmented data that you cannot trust for revenue analysis.
Structure your product objects
Every item object you send to GA4 follows the same structure. You define it once and reuse it across every ecommerce event so GA4 can connect the same product across view_item, add_to_cart, and purchase events without gaps. Here is a complete item object for a training course:
{
  item_id: "COURSE-042",
  item_name: "GDPR Compliance Fundamentals",
  item_brand: "Atrixware",
  item_category: "Compliance",
  item_category2: "GDPR",
  price: 149.00,
  quantity: 1,
  currency: "USD"
}
Use a consistent item_id that matches your LMS’s internal course ID so you can join GA4 revenue data with your LMS enrollment records later. The item_category fields (GA4 supports up to five levels) let you slice revenue by training type, department, or subject area inside GA4 explorations without building custom dimensions.
Your item objects should also stay consistent between events. If view_item sends item_id: "COURSE-042" but your purchase event sends item_id: "course-042", GA4 treats them as two separate products and breaks the funnel analysis you depend on for optimization.
Track promotions and item lists
GA4 also tracks promotional banners and catalog list positions through additional parameters on your item objects. When a learner sees a featured course banner and clicks it, you fire select_promotion with the promotion details. When they browse your course catalog, you include item_list_name and index (the item’s position in the list) inside each item object so GA4 records where in the catalog each conversion originated.
Tracking list position lets you compare conversion rates by catalog placement, which tells you whether featured or top-listed courses actually drive more purchases than courses buried further down the page.
The table below shows which optional fields to add depending on the context:
| Context | Additional fields to include |
|---|---|
| Course catalog page | item_list_id, item_list_name, index |
| Promotional banner | promotion_id, promotion_name, creative_slot |
| Bundled seat license | item_variant, affiliation |
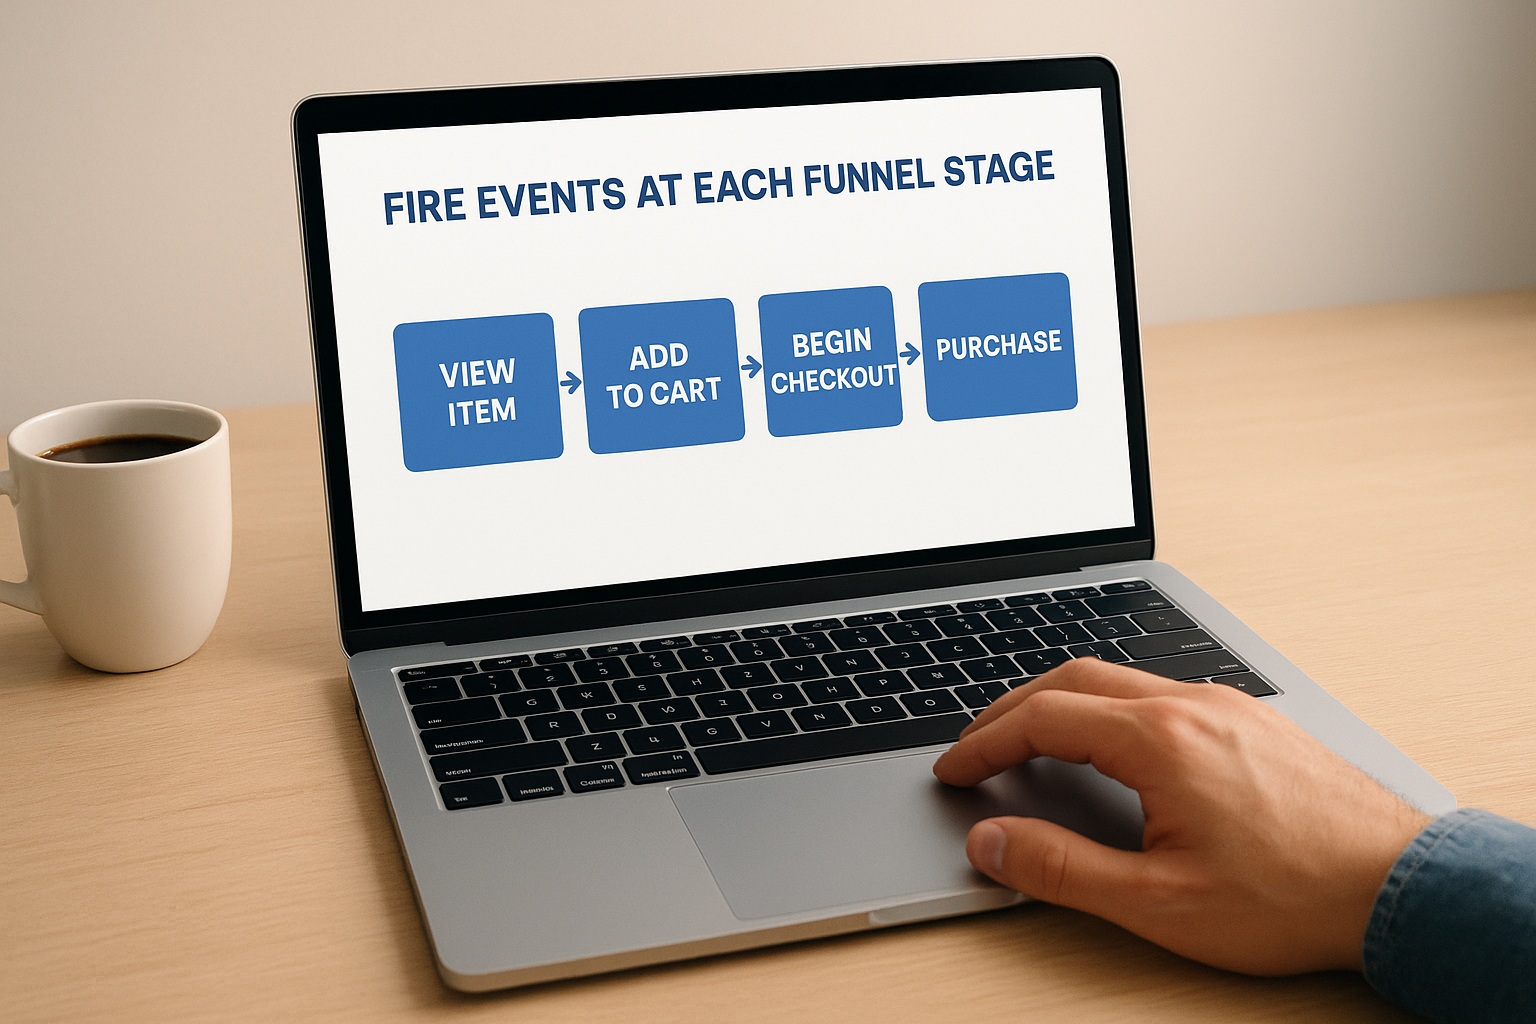
Step 4. Track the full shopping funnel in GA4
With your product objects mapped and your tagging in place, you can now fire the full sequence of ecommerce events that covers every step between a learner discovering a course and completing a purchase. This is the core of any google analytics ecommerce training implementation. Each event in the funnel gives GA4 the data it needs to populate its built-in funnel exploration reports, so skipping middle-of-funnel events like begin_checkout or add_payment_info leaves gaps that prevent accurate drop-off analysis.
Fire events at each funnel stage
You trigger each event at the exact moment the corresponding action occurs in your checkout flow. Place the view_item call when the course detail page loads, not when the user scrolls down the page. Place begin_checkout when the user lands on your checkout page or clicks a checkout button, not when they finish entering their details. Timing matters because GA4 uses event sequence and timestamps to build funnel reports, and out-of-order events produce misleading drop-off percentages.
Below is a complete code sequence covering the full funnel for a single course purchase:
// Course detail page loads
gtag("event", "view_item", {
  currency: "USD",
  value: 149.00,
  items: [{ item_id: "COURSE-042", item_name: "GDPR Compliance Fundamentals", price: 149.00, quantity: 1 }]
});

// Learner clicks Add to Cart
gtag("event", "add_to_cart", {
  currency: "USD",
  value: 149.00,
  items: [{ item_id: "COURSE-042", item_name: "GDPR Compliance Fundamentals", price: 149.00, quantity: 1 }]
});

// Learner reaches checkout page
gtag("event", "begin_checkout", {
  currency: "USD",
  value: 149.00,
  items: [{ item_id: "COURSE-042", item_name: "GDPR Compliance Fundamentals", price: 149.00, quantity: 1 }]
});

// Order confirmed
gtag("event", "purchase", {
  transaction_id: "T-98201",
  currency: "USD",
  value: 149.00,
  items: [{ item_id: "COURSE-042", item_name: "GDPR Compliance Fundamentals", price: 149.00, quantity: 1 }]
});
Connect funnel stages with consistent data
GA4 links events across the funnel using matching item_id values and the same session context, not a tracking ID you assign manually. Every event in the sequence above carries the same item_id, which allows GA4 to trace that specific course from a product view through to a completed transaction without you doing anything extra.
If a learner adds two courses to their cart, include both item objects in the
itemsarray for every subsequent event, includingbegin_checkoutandpurchase, so your cart-level revenue figures stay accurate across all funnel stages.
You should also pass the value parameter at the event level as well as inside each item object. GA4 uses the top-level value for revenue metrics in standard reports, while item-level price values power the product-specific breakdowns inside ecommerce and exploration reports.
Step 5. Validate data with DebugView and test orders
Before you trust any data in your GA4 reports, you need to confirm that every event fires correctly and passes the right parameters. Skipping validation is how teams end up making decisions based on broken tracking they don’t discover until weeks later. GA4 gives you two concrete tools for this: DebugView for real-time event inspection and test orders to verify your purchase flow end to end.
Activate DebugView in GA4
DebugView shows you a live stream of events coming from your browser as you navigate your site. To enable it, install the Google Analytics Debugger Chrome extension, then open your site in Chrome with the extension active. In GA4, go to Admin > DebugView under the Property column. Your device will appear in the debugger panel within a few seconds of loading your site.
Confirm your DebugView panel shows your device before clicking through your checkout. If no device appears, check that the Chrome extension is enabled and that your GA4 Measurement ID matches what’s installed on the page.
As you move through your checkout, DebugView displays each event name and its parameters in real time. Click any event in the timeline to expand it and inspect the full items array. Verify that item_id, item_name, price, and quantity all carry the correct values at each funnel stage.
Place test orders to validate purchase events
DebugView confirms events fire, but you still need to place an actual test order to verify that your purchase event passes a valid transaction_id and that the value parameter matches the real transaction total. Use a discount code that brings the order total to a small amount, or work with your LMS platform’s sandbox or test payment mode if one is available.
After completing a test purchase, check DebugView immediately for the purchase event. Then verify these four fields are accurate:
| Field | What to confirm |
|---|---|
transaction_id |
Unique value, not blank or repeated |
value |
Matches the actual order total |
currency |
Correct three-letter code (e.g., USD) |
items |
Contains every purchased course |
Run at least two test transactions with different courses or quantities to confirm your implementation handles variable cart contents correctly before launching to live traffic.
Step 6. Configure conversions, attribution, and links
Once your ecommerce events are validated and firing correctly, you need to tell GA4 which events actually matter for your business, connect the right attribution model, and link GA4 to other Google tools. This configuration step determines how GA4 assigns credit for revenue across your marketing channels and which events appear in your conversion reports. Skipping it means your purchase data exists in GA4 but contributes nothing to your optimization decisions.
Mark the purchase event as a conversion
GA4 automatically marks the purchase event as a key event (what older GA4 documentation called a conversion), so it appears in your conversion reports without additional configuration. Confirm this is active by going to Admin > Events inside your GA4 property. Find purchase in the event list and verify the "Mark as key event" toggle is turned on. If you also want to track begin_checkout or add_to_cart as secondary conversion signals, enable those toggles individually from the same screen.
Marking too many events as key events dilutes your conversion rate metrics, so limit your key events to actions that directly represent business value, such as completed purchases or high-intent checkout steps.
Set your attribution model
GA4’s default attribution model is data-driven attribution, which distributes credit across touchpoints using machine learning. For most training businesses, data-driven attribution works well because it accounts for the multi-session research journey learners take before buying a course. You can review and change your model by navigating to Admin > Attribution Settings. If your sales cycle is short and most learners buy on their first visit, last-click attribution gives you a simpler, more literal view of which channel closed each sale.
Link GA4 to Google Ads and Search Console
Connecting GA4 to your Google Ads account lets you import key events as conversion actions directly inside Google Ads, which is essential if you run paid campaigns to promote your training catalog. Go to Admin > Google Ads Links and follow the prompts to link your account. Separately, linking Google Search Console through Admin > Search Console Links adds organic search query data to your GA4 reports, so you can see which search terms drive course purchases without leaving your google analytics ecommerce training dashboard.
| Integration | Where to configure | Primary benefit |
|---|---|---|
| Google Ads | Admin > Google Ads Links | Import purchase conversions into ad campaigns |
| Search Console | Admin > Search Console Links | Add organic query data to GA4 reports |
Step 7. Build GA4 ecommerce reports and explorations
With your events firing and conversions configured, you’re ready to pull meaningful revenue insights out of GA4. This is the payoff stage of your google analytics ecommerce training work: turning validated event data into reports that show exactly which courses sell, where learners drop off, and which channels drive the most revenue for your training business.
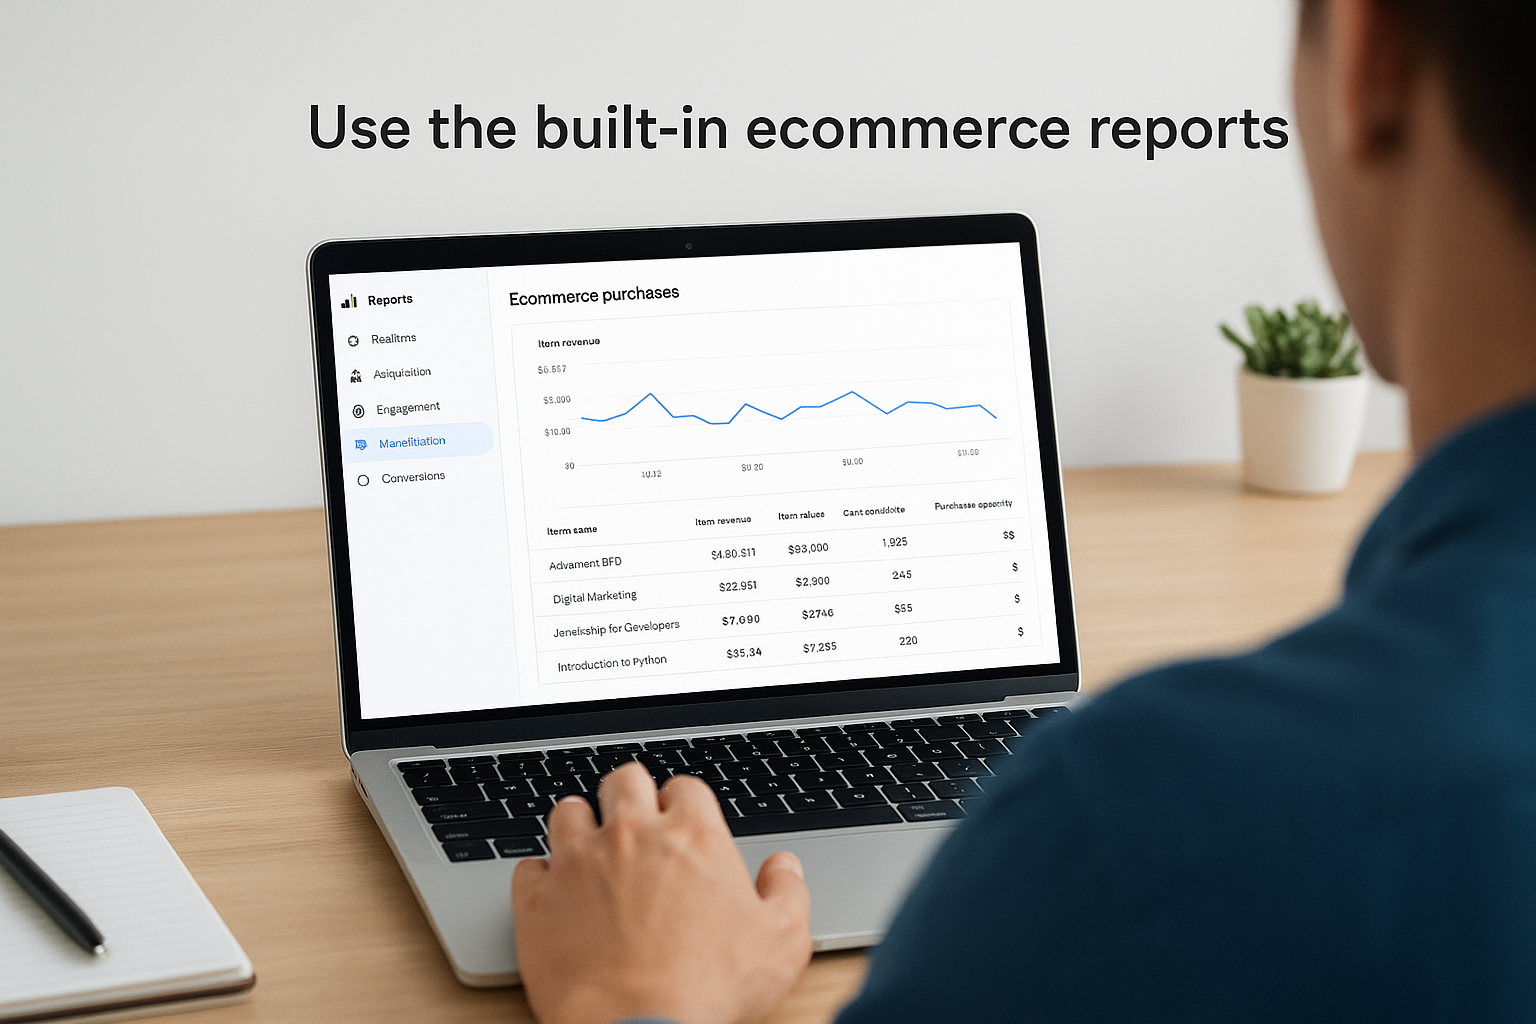
Use the built-in ecommerce reports
GA4 includes a set of pre-built ecommerce reports under Reports > Monetization. Navigate there and you’ll find three core views: Ecommerce Purchases, In-App Purchases, and Promotions. For a course catalog, the Ecommerce Purchases report is your starting point. It shows item revenue, item views, cart additions, and purchase quantity broken down by item name, so you can immediately see which courses earn the most and which ones attract views but fail to convert.
Filter the Ecommerce Purchases report by
item_categoryto compare revenue across training types, such as compliance versus skills training, without building a custom report from scratch.
Build a funnel exploration
The built-in reports show outcomes, but a funnel exploration shows you where learners abandon your checkout. Open Explore from the left nav, create a new blank exploration, and select "Funnel Exploration" from the technique dropdown. Add your funnel steps in this order, matching the events you implemented:
| Step | Event name |
|---|---|
| 1 | view_item |
| 2 | add_to_cart |
| 3 | begin_checkout |
| 4 | purchase |
Set the funnel type to open so GA4 counts users who enter at any stage, not only those who started at step one. This gives you an accurate read on how many learners abandon between checkout start and payment completion, which is typically the highest-leverage drop-off point to fix.
Create revenue breakdowns with free-form explorations
Free-form explorations let you slice revenue data by any dimension combination GA4 collects. Create a new exploration, add "Item name" and "Session source / medium" as rows, then pull in "Item revenue" and "Transactions" as values. This table shows you exactly which traffic sources drive purchases for each course, so you can stop guessing and start investing your marketing budget where it actually converts.
Apply a date comparison to the exploration to measure revenue growth month over month without leaving your GA4 dashboard.
Fix common GA4 ecommerce tracking issues
Even a carefully built google analytics ecommerce training setup runs into problems. Most issues fall into a small set of repeating patterns that are straightforward to diagnose once you know what to look for. Before assuming your implementation is broken, check these specific failure points and apply the corresponding fix.
Revenue shows zero or blank in reports
This problem almost always traces back to a missing or misformatted value parameter at the event level. GA4 uses the top-level value field, not the item-level price fields, to populate revenue in standard reports. If you pass value: 0, omit it entirely, or accidentally pass it as a string instead of a number, GA4 records the event but writes zero to every revenue metric.
Check your
purchaseevent in DebugView and confirm thatvalueappears as a numeric type, not wrapped in quotes, and that it matches the sum of all item prices multiplied by their quantities.
Fix it by auditing the gtag("event", "purchase", { value: 149.00 }) call in your code and confirming the field is a raw number, not a string.
Duplicate transactions inflate revenue
When a learner reloads the order confirmation page, GA4 fires the purchase event again unless you protect against it. The fix is straightforward: use a unique transaction_id on every order and set a short-lived cookie or session flag on the confirmation page so the event only fires once per page visit.
Events fire but ecommerce reports stay empty
If DebugView shows your events arriving but the Monetization reports remain blank, the most likely cause is that your event names don’t exactly match GA4’s reserved names. A typo like Add_to_cart instead of add_to_cart breaks recognition entirely because GA4’s ecommerce report logic is case-sensitive and exact-match only. Audit every event name in your implementation against the official list in the GA4 event reference.
Item IDs differ between funnel events
GA4 links events across your funnel by matching item_id values. If view_item sends COURSE-042 but purchase sends course-042, GA4 treats them as separate products and breaks funnel continuity. Standardize your item IDs at the data layer level so every event in the sequence pulls from the same source, not from different page templates or variables.
Next steps
You now have a complete google analytics ecommerce training framework: from GA4 property setup and event tagging through funnel validation, conversion configuration, and custom reporting. The pattern is repeatable. Set up your events correctly, validate with DebugView, and build explorations that answer specific revenue questions. Each step you complete gives you cleaner data and better decisions about which courses to promote and where your checkout flow loses buyers.
Your next priority is putting this tracking to work on a real training storefront. If you sell courses through an LMS and haven’t confirmed your checkout fires accurate purchase events yet, start there. Broken or missing tracking costs you the revenue insights you need to grow. If you’re still evaluating whether your current setup can support the kind of ecommerce tracking this guide covers, take the LMS readiness quiz to find out where you stand.