Getting a Google Docs electronic signature set up correctly can save hours of back-and-forth, especially when you’re managing training acknowledgments, compliance forms, or onboarding documents. If your team already lives in Google Workspace, it makes sense to handle signatures right where the documents are created, no printing, scanning, or chasing down wet ink.
At Atrixware, we build Axis LMS to help organizations streamline their training programs, and we know firsthand how much paperwork surrounds that process. Signed training policies, compliance certifications, and course completion agreements pile up fast. That’s why getting your signature workflow right matters.
This guide walks you through exactly how to add and request electronic signatures in Google Docs, covering Google’s built-in eSignature feature and third-party options. Whether you need a single signature or approvals from an entire team, you’ll find a method that fits.
What you need before you start
Before you dive into the steps, a few setup details will save you time. Google’s native eSignature feature is not available on every plan, and some options require specific account types or settings that an administrator controls. Checking these items now means you won’t hit a wall halfway through.
Google’s eSignature tool is available to Google Workspace Individual subscribers and select business tiers, so verify your plan before you start.
Google Workspace plan and admin access
Your ability to use Google Docs eSignature natively depends on your Workspace subscription. The feature is available to Google Workspace Individual plans and is being rolled out to Business Standard, Business Plus, Enterprise, and Education plans. If you’re on a free personal Gmail account, you won’t see the native eSignature option and will need a third-party add-on instead. If your organization manages your account, your Google Workspace admin may need to enable the feature in the Admin console before it appears for you.
Checklist before you begin
Run through these items before opening any document:
- Google Workspace account: Confirm you have a paid Workspace plan (not a free Gmail account)
- Admin permissions: Verify that eSignature is enabled in your domain settings, or ask your admin to turn it on
- Document ownership: You must own the Google Doc or hold editor access to send signature requests
- Signer email addresses: Gather valid email addresses for everyone who needs to sign
- PDF files: If you plan to use Drive’s PDF signing feature, upload the file to Google Drive before you begin
Step 1. Turn on Google Docs eSignature
Before you can use the Google Docs electronic signature feature, a Google Workspace admin must enable it at the domain level. This is a one-time setup, and it unlocks the option for all eligible users on your plan. If you are the admin, set aside about two minutes to complete the steps below.
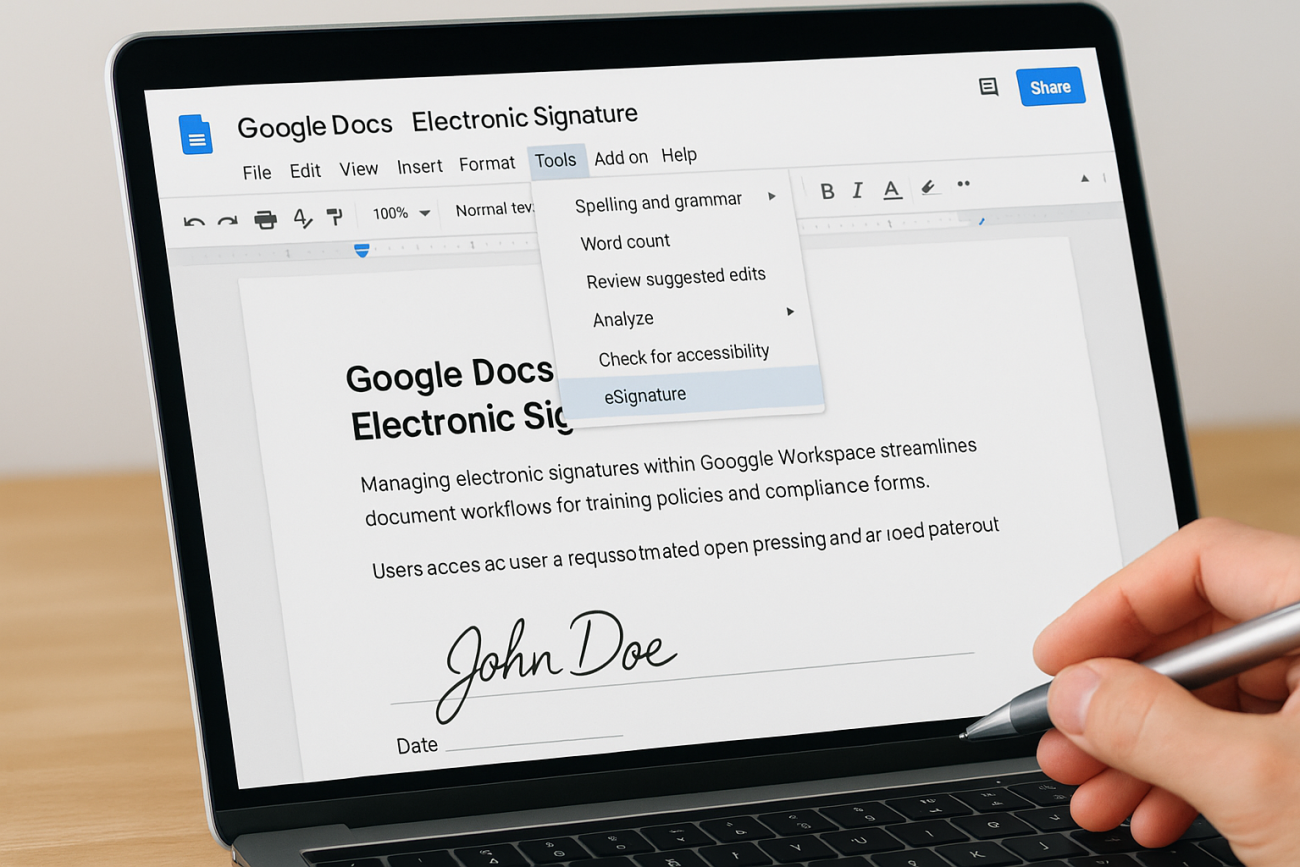
If you manage your own Workspace Individual account, the feature may already be active. Check by opening a Google Doc and clicking Tools in the top menu bar.
Enable eSignature in the Admin Console
Admins turn on eSignature through the Google Admin console. The setting sits inside the Drive and Docs section, and the change takes effect for your entire domain within a few minutes of saving.

- Sign in at admin.google.com
- Navigate to Apps > Google Workspace > Drive and Docs
- Click eSignature
- Toggle the feature on for your organization or a specific organizational unit
- Click Save
Once the setting is live, eligible users will see the eSignature option appear under the Tools menu the next time they open a Google Doc. Non-admin users do not need to take any additional steps after that.
Step 2. Add fields and send signature requests
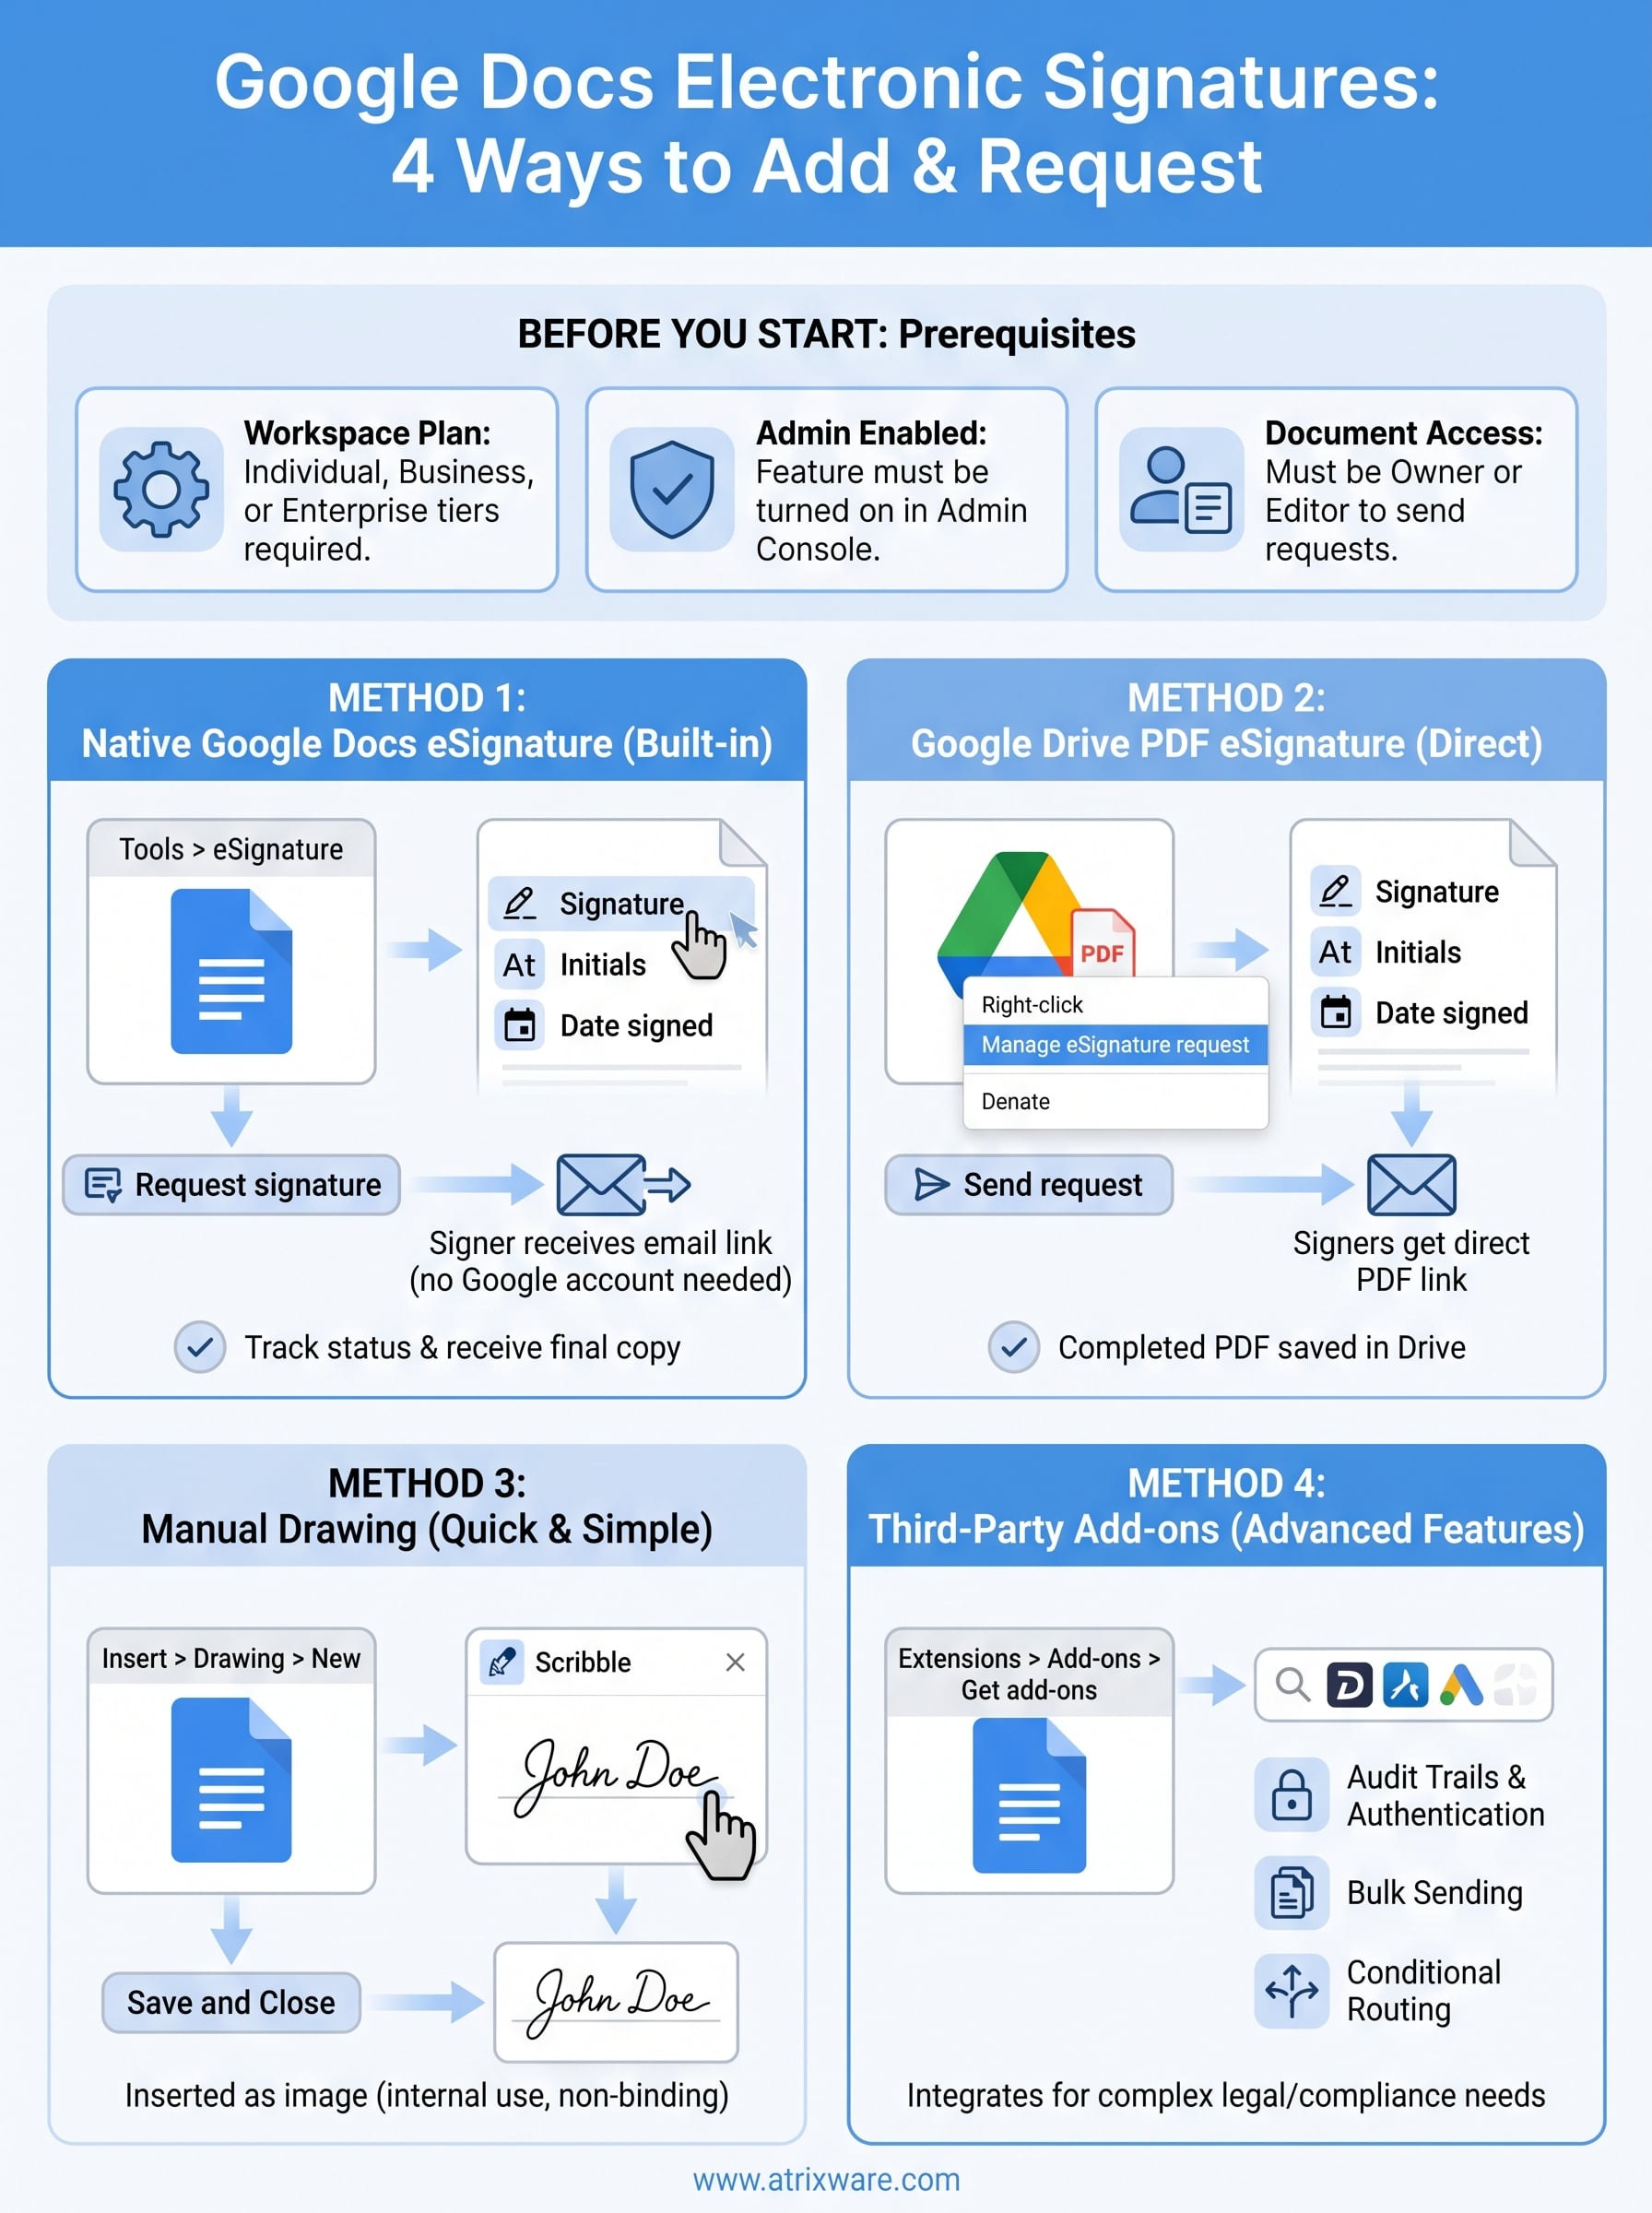
Once eSignature is enabled, open the Google Doc you want to send, then go to Tools > eSignature. A panel opens on the right where you add fields and assign signers. This drives the core Google Docs electronic signature workflow.
You can add multiple signers to one document, and each field you insert gets tied to a specific person’s email address.
Insert fields and assign signers
The eSignature panel gives you three field types to place on your document:

- Signature: captures the signer’s full signature
- Initials: useful for multi-page documents
- Date signed: auto-fills when the signer completes the document
Click a field type, then click the location where you want it. Assign each field to a signer by entering their email address in the panel.
Send the request
After your fields are placed, click Request signature at the bottom of the panel. Add an optional message, then confirm. Google sends each signer an email notification with a direct link to sign.
Your signers do not need a Google account to complete the request. They open the link in any browser and sign directly on the page.
Step 3. Request eSignatures on PDFs in Drive
Google Drive lets you request signatures on PDF files directly, without converting them to Google Docs first. This comes in handy when you already have a finalized training agreement, compliance form, or policy document in PDF format that you don’t want to rebuild from scratch inside a Doc.
PDFs keep their original layout when sent for signature, so your document looks exactly as intended when signers open it.
How to send a PDF for signing
Open Google Drive and locate the PDF you need signed. Right-click the file and choose Manage eSignature request, or open the file and click the pen icon in the top toolbar. From there, the setup mirrors the Google Docs electronic signature workflow you used in the previous step.
- Enter each signer’s email address in the recipients panel
- Drag signature, initials, and date fields onto the relevant pages
- Click Send request to deliver a direct signing link by email
Signers open the link in any browser and complete the signature fields without needing a Google account. You track completion status directly from Drive, and Google emails you a copy of the fully executed document once everyone signs.
Step 4. Use a quick manual signature
Sometimes you just need to sign a document yourself without setting up a full request workflow. Google Docs lets you insert a drawing-based signature directly into any document, which works well for quick internal forms or documents you’ll share as PDFs afterward.
This method does not carry the same legal weight as a formal eSignature request, so use it for internal documents rather than legally binding agreements.
Draw your signature in Google Docs
You can create a manual signature using Google Docs’ built-in drawing tool in just a few clicks.
- Place your cursor where you want the signature to appear
- Click Insert > Drawing > New
- Select the Scribble tool from the line dropdown
- Draw your signature with your mouse or touchpad
- Click Save and Close to insert it into the document
Your drawn signature drops into the document as an image. You can resize or reposition it by clicking and dragging. This approach keeps your Google Docs electronic signature simple when a full formal request workflow is more than the situation requires.
Step 5. Use an e-sign tool when you need more
Google’s native eSignature covers most basic workflows, but it has real limits. If you need audit trails, signer authentication, custom branding, or legal compliance across multiple jurisdictions, a dedicated e-sign platform gives you controls that a Google Docs electronic signature workflow cannot match.
Third-party tools like DocuSign and Adobe Acrobat Sign integrate directly with Google Drive and Docs through add-ons available in the Google Workspace Marketplace.
When to switch to a dedicated tool
Some situations push past what Google’s built-in feature handles well. Consider a dedicated platform when your documents require:
- Signer identity verification beyond email, such as SMS codes or knowledge-based authentication
- Tamper-evident audit logs with timestamps and IP addresses
- Bulk sending to hundreds of signers at once
- Conditional routing so documents move to the next signer only after the previous one completes
How to install an e-sign add-on
You can add a third-party signing tool directly inside Google Docs without leaving your browser.
- Open a Google Doc and click Extensions > Add-ons > Get add-ons
- Search for your preferred tool
- Click Install and grant the requested permissions
- Open the add-on from Extensions to start your signing workflow
Next steps
You now have four working methods to handle any google docs electronic signature situation, from Google’s native tool to PDF signing in Drive to third-party add-ons. Pick the method that matches your document type and legal requirements, then build it into your team’s workflow so signatures stop creating delays.
If your organization runs training programs, the signature step is just one piece of a larger process. Tracking who signed what, when, and which course they completed takes more than a signed document sitting in a folder. A dedicated learning management system ties all of that together in one place, giving you compliance records and learner progress data without hunting through email threads or shared drives.
Ready to see how a full LMS fits your training setup? Take the LMS readiness quiz to find out where you stand and what your next move should be.