Most businesses already pay for Microsoft 365, but few realize they can handle microsoft electronic signature workflows without bolting on another subscription. Whether you need signatures on training acknowledgments, compliance documents, or internal policies, Microsoft’s built-in tools can get the job done.
The catch? Microsoft scatters its e-signature features across multiple apps, Word, Outlook, SharePoint, and the newer Approvals tool in Teams. Knowing which tool fits your use case saves time and avoids the clunky workarounds that frustrate both senders and signers. For organizations that manage training and compliance through platforms like Axis LMS, pairing your LMS workflows with Microsoft’s signature capabilities creates a tighter, more auditable process from course completion to signed documentation.
This guide walks you through creating and requesting electronic signatures across the Microsoft 365 ecosystem, step by step. You’ll learn which methods offer legally binding signatures, where the limitations are, and when it makes sense to use a dedicated e-signature integration instead. Let’s get into it.
What Microsoft offers for e-signatures
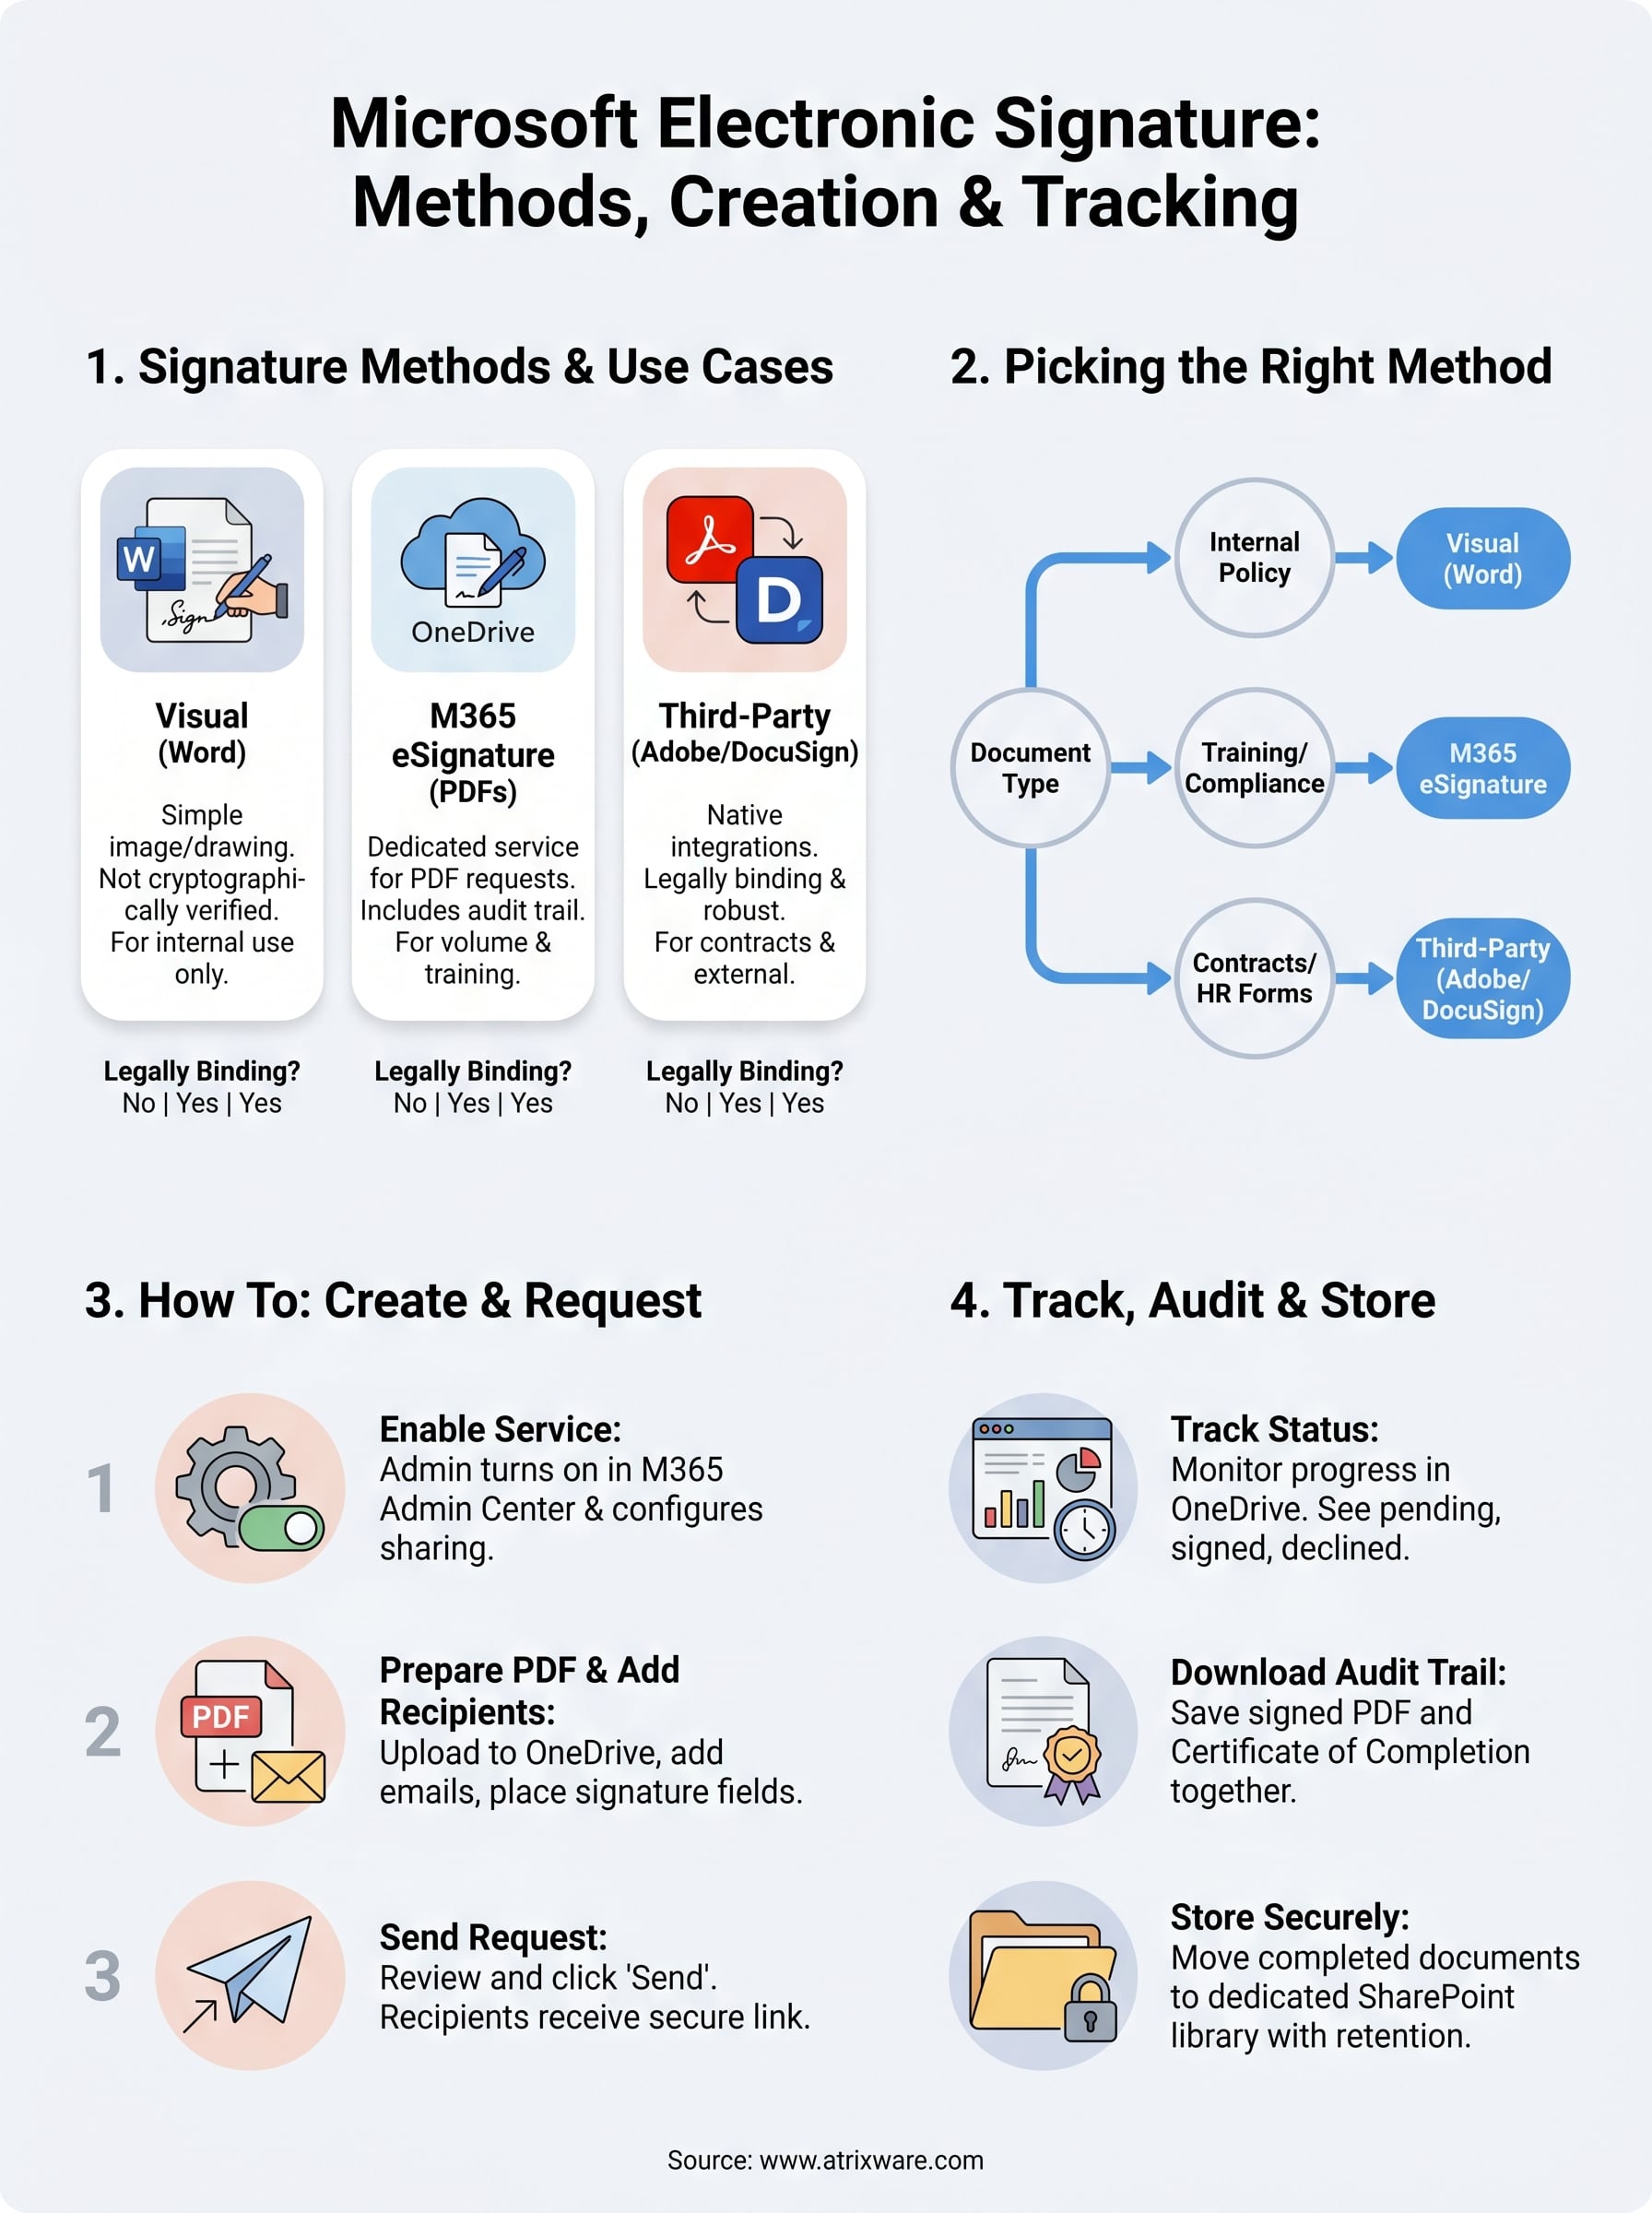
Microsoft has spread its e-signature capabilities across several tools, and understanding each one helps you build a reliable microsoft electronic signature process for your documents. At a high level, you have three categories: visual signatures inside Word, the newer dedicated Microsoft 365 eSignature service for PDFs, and built-in integrations with third-party providers like Adobe Sign and DocuSign. None of these are one-size-fits-all, and the legally binding level varies significantly between them.
Visual signatures in Word
Word lets you insert a signature in two distinct ways. The first is a visual signature, which is simply your name typed in a script font, an image of your handwritten signature, or a drawing you make with your mouse or stylus. These look like signatures, but they carry no cryptographic verification. Anyone can copy or alter them, which makes them suitable only for internal documents where legal enforceability is not a concern.
The second option is a digital signature using a certificate from a trusted Certificate Authority (CA). When you apply a certificate-based signature in Word, the document locks and any tampering invalidates the signature. You can insert one by going to Insert > Signature Line, completing the setup dialog, and then right-clicking the signature line to select "Sign." Microsoft documents the full process at support.microsoft.com.
Certificate-based digital signatures in Word are legally binding under standards like the U.S. Electronic Signatures in Global and National Commerce Act (ESIGN) and the EU’s eIDAS regulation, provided the certificate comes from an accredited CA.
Microsoft 365 eSignature in OneDrive
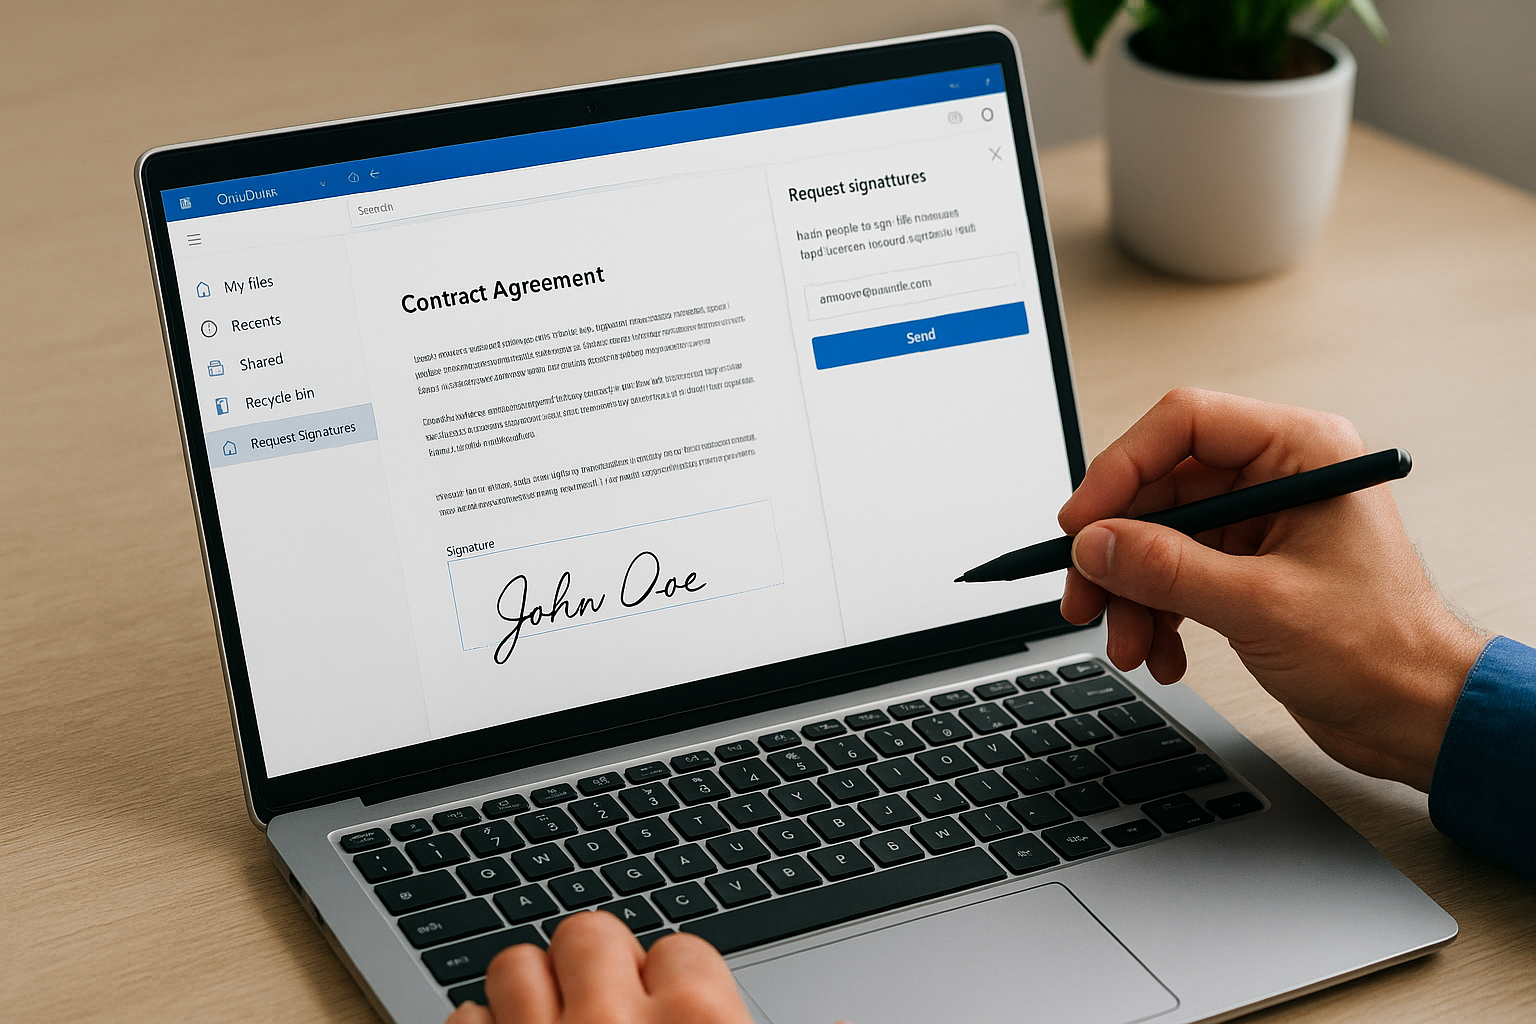
Microsoft launched a dedicated eSignature service directly inside OneDrive and SharePoint in 2023. This feature lets you request signatures on PDF files without leaving the Microsoft 365 environment. You open a PDF in OneDrive, click Request signatures, add recipient email addresses, drag signature fields onto the document, and send. Recipients sign through a secure link, and the completed document saves back to OneDrive automatically.
Your organization benefits most from this service if you handle volume signature requests and need an audit trail built into your cloud storage. It supports multiple signers, tracks status in real time, and stores a certificate of completion with each signed document. Availability depends on your Microsoft 365 plan and region, so confirm access at support.microsoft.com before building a workflow around it.
Third-party integrations inside Microsoft 365
Microsoft has built native connectors for Adobe Acrobat Sign and DocuSign directly into Microsoft 365 applications. You can access these integrations inside Word, SharePoint, and Teams through the app’s built-in add-in marketplace. Once installed, they surface as menu options, so you send a legally binding signature request without leaving the application you are already working in.
Both integrations require an active subscription to the respective third-party service. However, many organizations already have enterprise agreements that cover these tools. If your organization runs compliance training through a platform like Axis LMS, pairing it with one of these integrations lets you route signed training acknowledgments directly back into your records workflow without manual transfers.
Here is a quick comparison of the core options:
| Method | Legally Binding | Audit Trail | Requires Extra Subscription |
|---|---|---|---|
| Word visual signature | No | No | No |
| Word certificate-based | Yes | Partial | Depends on CA |
| Microsoft 365 eSignature | Yes | Yes | Included in select plans |
| Adobe Sign integration | Yes | Yes | Yes |
| DocuSign integration | Yes | Yes | Yes |
Pick the right signature method in Microsoft 365
Before you set up your first microsoft electronic signature request, you need to choose the right tool for your specific situation. Using the wrong method wastes time and can create compliance gaps, especially if you handle regulated documents like training acknowledgments, HR policy sign-offs, or GDPR consent records. The table below maps common document types to the best Microsoft 365 option available to you.
Match the method to your document type
Your document’s legal requirements and your recipients’ technical setup are the two biggest factors in picking a method. If you need a legally enforceable signature on a contract or compliance form, a visual signature in Word will not protect you. Instead, use the Microsoft 365 eSignature service for PDFs or one of the certificate-based approaches in Word.
| Document Type | Recommended Method | Reason |
|---|---|---|
| Internal policy acknowledgment | Word visual signature | Low risk, quick to complete |
| Training completion sign-off | Microsoft 365 eSignature | Audit trail stored in OneDrive |
| HR onboarding forms | Adobe Sign or DocuSign integration | Legally binding, third-party audit log |
| Regulated compliance documents | Certificate-based Word signature or third-party | Meets ESIGN and eIDAS requirements |
| Vendor or partner contracts | Adobe Sign or DocuSign integration | Enterprise-grade audit trail and legal standing |
If your organization falls under FDA 21 CFR Part 11, HIPAA, or similar regulations, always verify that your chosen method meets the specific evidentiary standards required before collecting signatures at scale.
When to use the built-in eSignature vs. a third-party add-in
Microsoft’s built-in eSignature service works well when your signers already have Microsoft accounts and your documents live in OneDrive or SharePoint. The setup is minimal, the audit trail saves automatically to your cloud storage, and there is no additional subscription cost on qualifying plans. For routine internal documents, this is often the most straightforward path.
Third-party add-ins like Adobe Sign or DocuSign make more sense when you send high volumes of documents, need advanced routing logic, or require signatures from people outside your Microsoft environment. These tools also offer deeper compliance certifications, better customization for signature fields, and more robust reporting. If you already pay for one of these services at an enterprise level, use the Microsoft 365 integration to keep your team inside a familiar interface without switching applications mid-workflow.
Step 1. Enable eSignature, sharing, and billing
Before you send your first microsoft electronic signature request, you need to confirm that your Microsoft 365 tenant has the eSignature feature turned on, sharing permissions configured correctly, and billing set up if your plan requires it. Skipping these steps leads to broken request links and frustrated recipients who cannot open or sign the document.
Check your Microsoft 365 plan eligibility
The eSignature service in OneDrive is available on specific Microsoft 365 business and enterprise plans, not every tier. You can verify your organization’s plan by signing in to the Microsoft 365 admin center and checking the Billing > Your products section. Plans confirmed to support eSignature include:
- Microsoft 365 Business Standard
- Microsoft 365 Business Premium
- Microsoft 365 E3 and E5
- Office 365 E1, E3, and E5
If your plan does not include eSignature natively, you can purchase it as an add-on directly through the Microsoft 365 admin center before moving to the next steps.
Turn on the eSignature service in the admin center
Global administrators must enable the eSignature feature for your organization before any user can send a request. Sign in to the Microsoft 365 admin center, navigate to Settings > Org settings, and search for "eSignature." Toggle the feature on and save your changes. The setting can take up to 24 hours to propagate across all users in your tenant.

Once the toggle is on, confirm the feature is active by opening OneDrive on the web, selecting any PDF, and checking that the "Request signatures" option appears in the file’s context menu. If the option is missing after 24 hours, check your admin center for any pending service health alerts before contacting support.
Configure sharing and external access settings
Your OneDrive and SharePoint sharing settings determine whether external recipients can open and sign documents. Navigate to the SharePoint admin center, select Policies > Sharing, and confirm that sharing is set to at least "New and existing guests." Setting it to "Only people in your organization" blocks external signers from accessing the request link entirely.
For regulated industries that restrict external sharing by default, create a dedicated SharePoint site with its own sharing policy scoped specifically to signature workflows. This keeps your broader tenant settings more restrictive while still allowing the signature process to function correctly.
Step 2. Create and send an e-sign request
With the eSignature service enabled and your sharing settings confirmed, you can now build and send your first microsoft electronic signature request. The entire process runs inside OneDrive on the web, so you do not need to install anything extra or switch to a different application mid-task.
Prepare your PDF in OneDrive
Open OneDrive on the web and upload the PDF you want signed if it is not already there. Only PDF files are supported by the native eSignature service, so if your document is a Word file, export it to PDF first by selecting File > Export > Create PDF/XPS before uploading. Once the file appears in OneDrive, right-click it and select "Request signatures" from the context menu to open the signature request panel.
Add recipients and place signature fields
In the request panel, type the email address of each signer in the Recipients field. You can add multiple recipients and set the signing order if the document requires signatures in a specific sequence, for example, an employee signs first and a manager countersigns second.
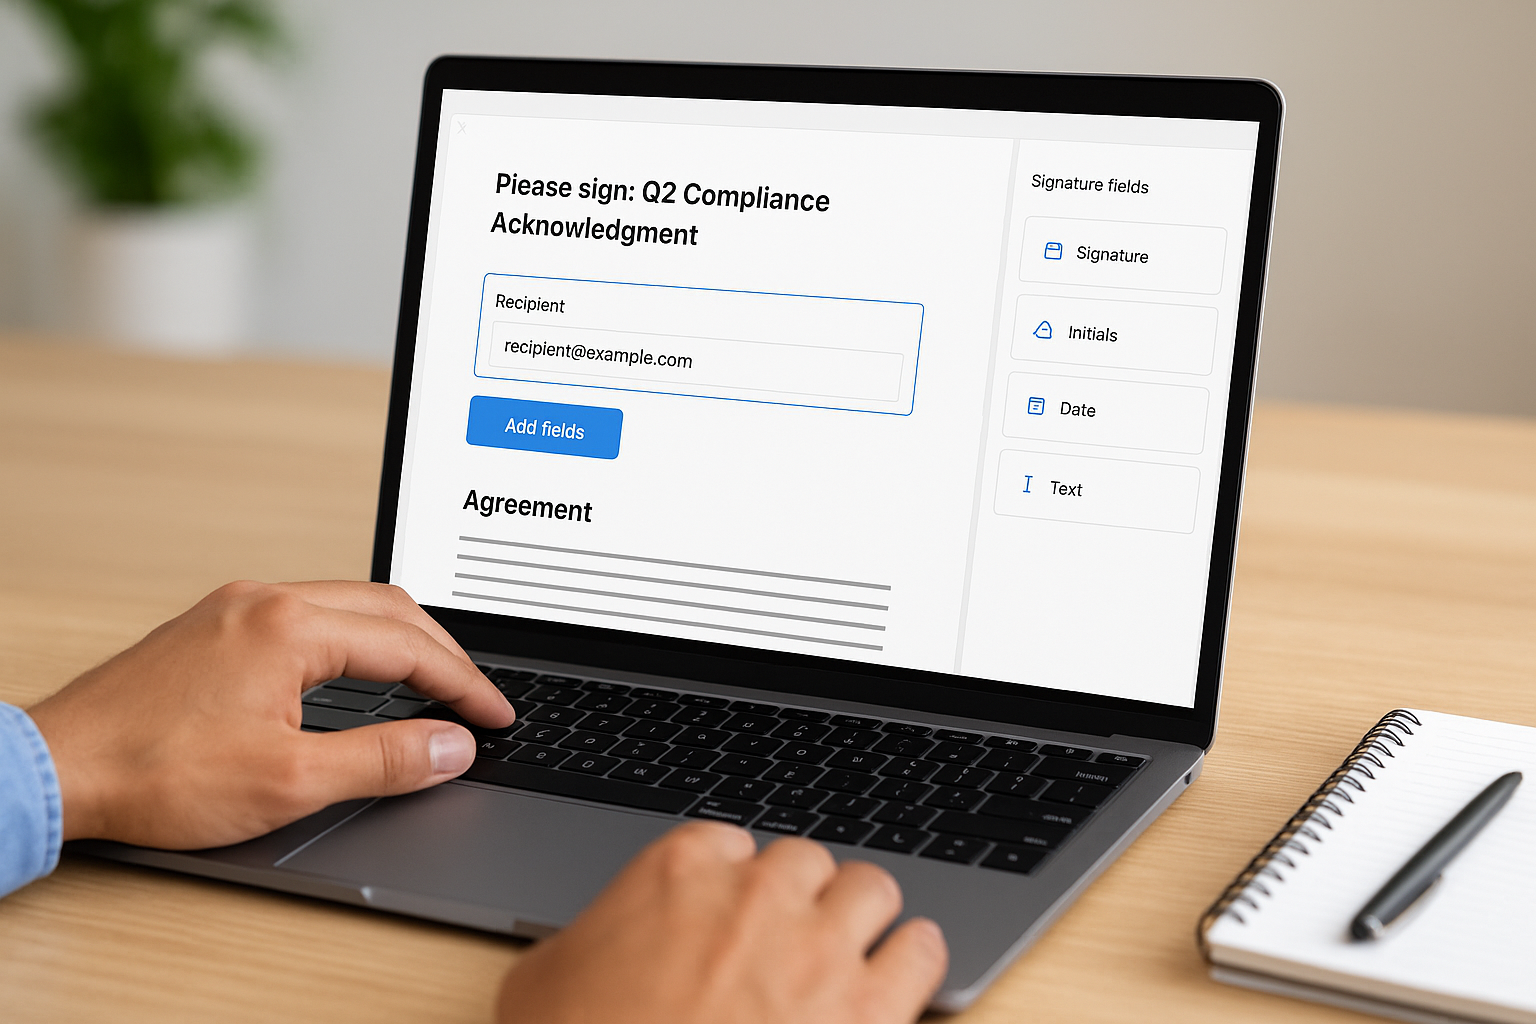
After adding recipients, click "Add fields" to open the document in the field placement editor. Drag the following field types onto the correct locations in the document:
- Signature: required for each signer who must apply a legally binding signature
- Initials: useful for multi-page documents where each page needs acknowledgment
- Date: auto-populates with the date the recipient signs
- Text: for typed information like printed names, job titles, or employee IDs
Assign each field to the correct recipient by selecting the recipient’s name in the field editor before placing the field. Unassigned fields will block the request from sending.
Review and send the request
Before sending, check your subject line and message in the request panel. A clear subject like "Please sign: Q2 Compliance Acknowledgment" helps recipients prioritize the email over generic notifications. You can also set a signing deadline to trigger automated reminders as the due date approaches.
Once everything looks correct, click "Send". Each recipient receives an email with a secure link. They do not need a Microsoft account to sign, which keeps the process friction-free for external contractors, partners, or customers who are outside your organization.
Step 3. Sign the document as a recipient
When someone sends you a microsoft electronic signature request through Microsoft 365, the signing experience is straightforward even if you do not have a Microsoft account. You receive a standard email notification with a secure link, and the entire signing process happens inside a browser with no software downloads required.
Open the signing link and verify your identity
Check your inbox for an email from Microsoft eSignature on behalf of the sender. The subject line will match whatever the sender typed when setting up the request. Click the "Review and sign" button inside the email to open the document in a secure signing session. Do not forward this link to others, because the session is scoped to your email address and tied to the specific request.
Before the document opens, Microsoft may ask you to verify your identity by entering a one-time code sent to the email address on the request. Enter the code when prompted. This step confirms you are the intended recipient and adds a layer of verification to the audit trail.
If you do not receive the verification code within a few minutes, check your spam or junk folder before asking the sender to resend the request.
Apply your signature and complete all fields
Once the document loads, you will see highlighted signature fields assigned to you. Fields assigned to other recipients are visible but locked so you cannot accidentally fill them in. Click on your first signature field to open the signature picker. You have three options for how your signature looks:
- Type: Enter your name and choose a script font
- Draw: Use your mouse, touchpad, or stylus to write your signature freehand
- Upload: Upload an image file of your handwritten signature
Choose whichever method you prefer, confirm it, and the signature appears in the field. Work through all remaining fields in sequence, including initials, date fields, and any text fields the sender requires. The interface flags any incomplete fields before it lets you submit, so you will not accidentally miss one.
Submit and confirm completion
After you fill in every assigned field, click the "Done" or "Submit" button at the top of the signing interface. Microsoft generates a signed copy and emails it to both you and the sender automatically. You will also receive a certificate of completion attached to that email, which includes the timestamp and a summary of the signing session for your records.
Step 4. Track status, audit, and storage
After you send a microsoft electronic signature request, your job is not finished. You need to monitor who has signed, pull the audit trail when required, and store completed documents where your team can find them quickly during a compliance review or dispute. Microsoft 365 handles most of this automatically, but you still need to know where to look and what to download.
Check request status in OneDrive
Open OneDrive on the web and navigate to the folder where your original PDF lives. Right-click the file and select "View request status" to open the tracking panel. This panel shows each recipient’s name, email address, and current status, either Pending, Signed, or Declined. If a recipient has not signed by your deadline, you can send a manual reminder directly from this panel without creating a new request.
You can also reach the status panel from the "Shared" section of your OneDrive sidebar, which lists all active requests you have sent or received. Filter by "Waiting for others" to surface only the requests that still need action.
Download the audit trail and certificate
Once all recipients complete their signatures, Microsoft generates a signed PDF and a separate certificate of completion. Both files save automatically to your OneDrive folder next to the original document. The certificate of completion includes the full signing timeline, recipient email addresses, IP addresses, identity verification results, and timestamps for every action taken during the request.
Download both files and store them together as a matched pair. During a compliance audit, you will need the certificate to prove the signature is valid and that the correct person signed at the correct time.
Never rely solely on the signed PDF without the matching certificate of completion. The PDF alone does not carry enough metadata to satisfy most regulatory evidentiary requirements.
Store completed documents correctly
Move your signed PDF and certificate into a dedicated SharePoint library rather than leaving them in a personal OneDrive folder. SharePoint gives you version control, permission management, and retention policies that a personal drive does not. Create a folder structure organized by document type and year, for example "Compliance > Signed Acknowledgments > 2026", so your team can locate records quickly without searching across multiple drives.
Apply a retention label to the library through the Microsoft Purview compliance portal if your organization is subject to document retention rules. This prevents accidental deletion and automates the archiving process when records reach the end of their required retention period.
Next steps
You now have a complete picture of how microsoft electronic signature workflows function inside Microsoft 365, from enabling the service in your admin center to storing signed documents in SharePoint with the right retention policies. The method you choose depends on your document type, legal requirements, and recipient setup, but the step-by-step process stays consistent once you pick the right tool for the job.
For organizations that manage training and compliance, pairing your signature workflows with a purpose-built LMS adds another layer of accountability. When learners complete a course and sign an acknowledgment, both records live in the same auditable system rather than scattered across email threads and shared drives. Axis LMS connects your training delivery directly to your documentation process, so nothing falls through the cracks during a compliance review.
If you want to see how that fits your current training setup, take the LMS readiness quiz to find out where you stand.