Configuring Azure AD SAML SSO setup through the Microsoft Entra ID portal is one of those tasks that sounds straightforward until you’re staring at a screen full of certificates, entity IDs, and reply URLs. Get one value wrong and your users hit a wall instead of a login screen. Whether you’re connecting an LMS, a CRM, or an internal tool, the configuration steps inside Entra ID follow the same core process, and getting it right the first time saves hours of troubleshooting.
At Atrixware, our Axis LMS supports SAML-based single sign-on with providers like Microsoft Entra ID (formerly Azure AD), Okta, Salesforce, and Ping Identity. We’ve walked hundreds of organizations through this exact setup. That hands-on experience is what shaped this guide, built from real configuration work, not recycled documentation.
This article walks you through each step of adding and configuring a SAML SSO enterprise application in the Entra ID portal. You’ll set up the basic SAML configuration, assign users and groups, download the federation metadata, and test the connection. By the end, you’ll have a working SSO integration ready for production.
What you need before you start
Before you touch a single setting in the Entra ID portal, gather what you need to complete this azure ad saml sso setup without stopping halfway. Missing a role assignment or a metadata URL mid-process forces you to backtrack and increases the chance of entering incorrect values. Taking a few minutes now to confirm everything is in place saves significant time later.
Azure AD roles and permissions
You need the right role assignment in Microsoft Entra ID before you can create or modify enterprise applications. Specifically, you must hold one of these roles: Global Administrator, Cloud Application Administrator, or Application Administrator. A standard user account or a read-only role blocks you before you finish the first configuration screen.
If you are not sure which role you hold, open the Microsoft Entra ID portal, navigate to Users, select your account, and choose "Assigned roles" to confirm your access level.
Your organization also needs an active Azure subscription tied to a Microsoft Entra ID tenant. If your organization uses a free tier, confirm that enterprise application SAML SSO is available, because some capabilities require a Microsoft Entra ID P1 or P2 license to function fully.
Application information and SAML metadata
Your service provider must supply specific values before you configure anything on the Entra side. These come from the application vendor or, if you are connecting Axis LMS, from your Axis LMS admin panel under SSO settings. Collect these before you open the portal:
| Value | What it is |
|---|---|
| Entity ID (Issuer) | Unique identifier for your application |
| Reply URL (ACS URL) | Endpoint that receives the SAML assertion |
| Sign-on URL | URL users visit to initiate login |
You also need a test user account that exists in both your Azure tenant and your application. Having this ready lets you run an end-to-end sign-in test the moment configuration is complete, rather than scrambling to set one up after the fact.
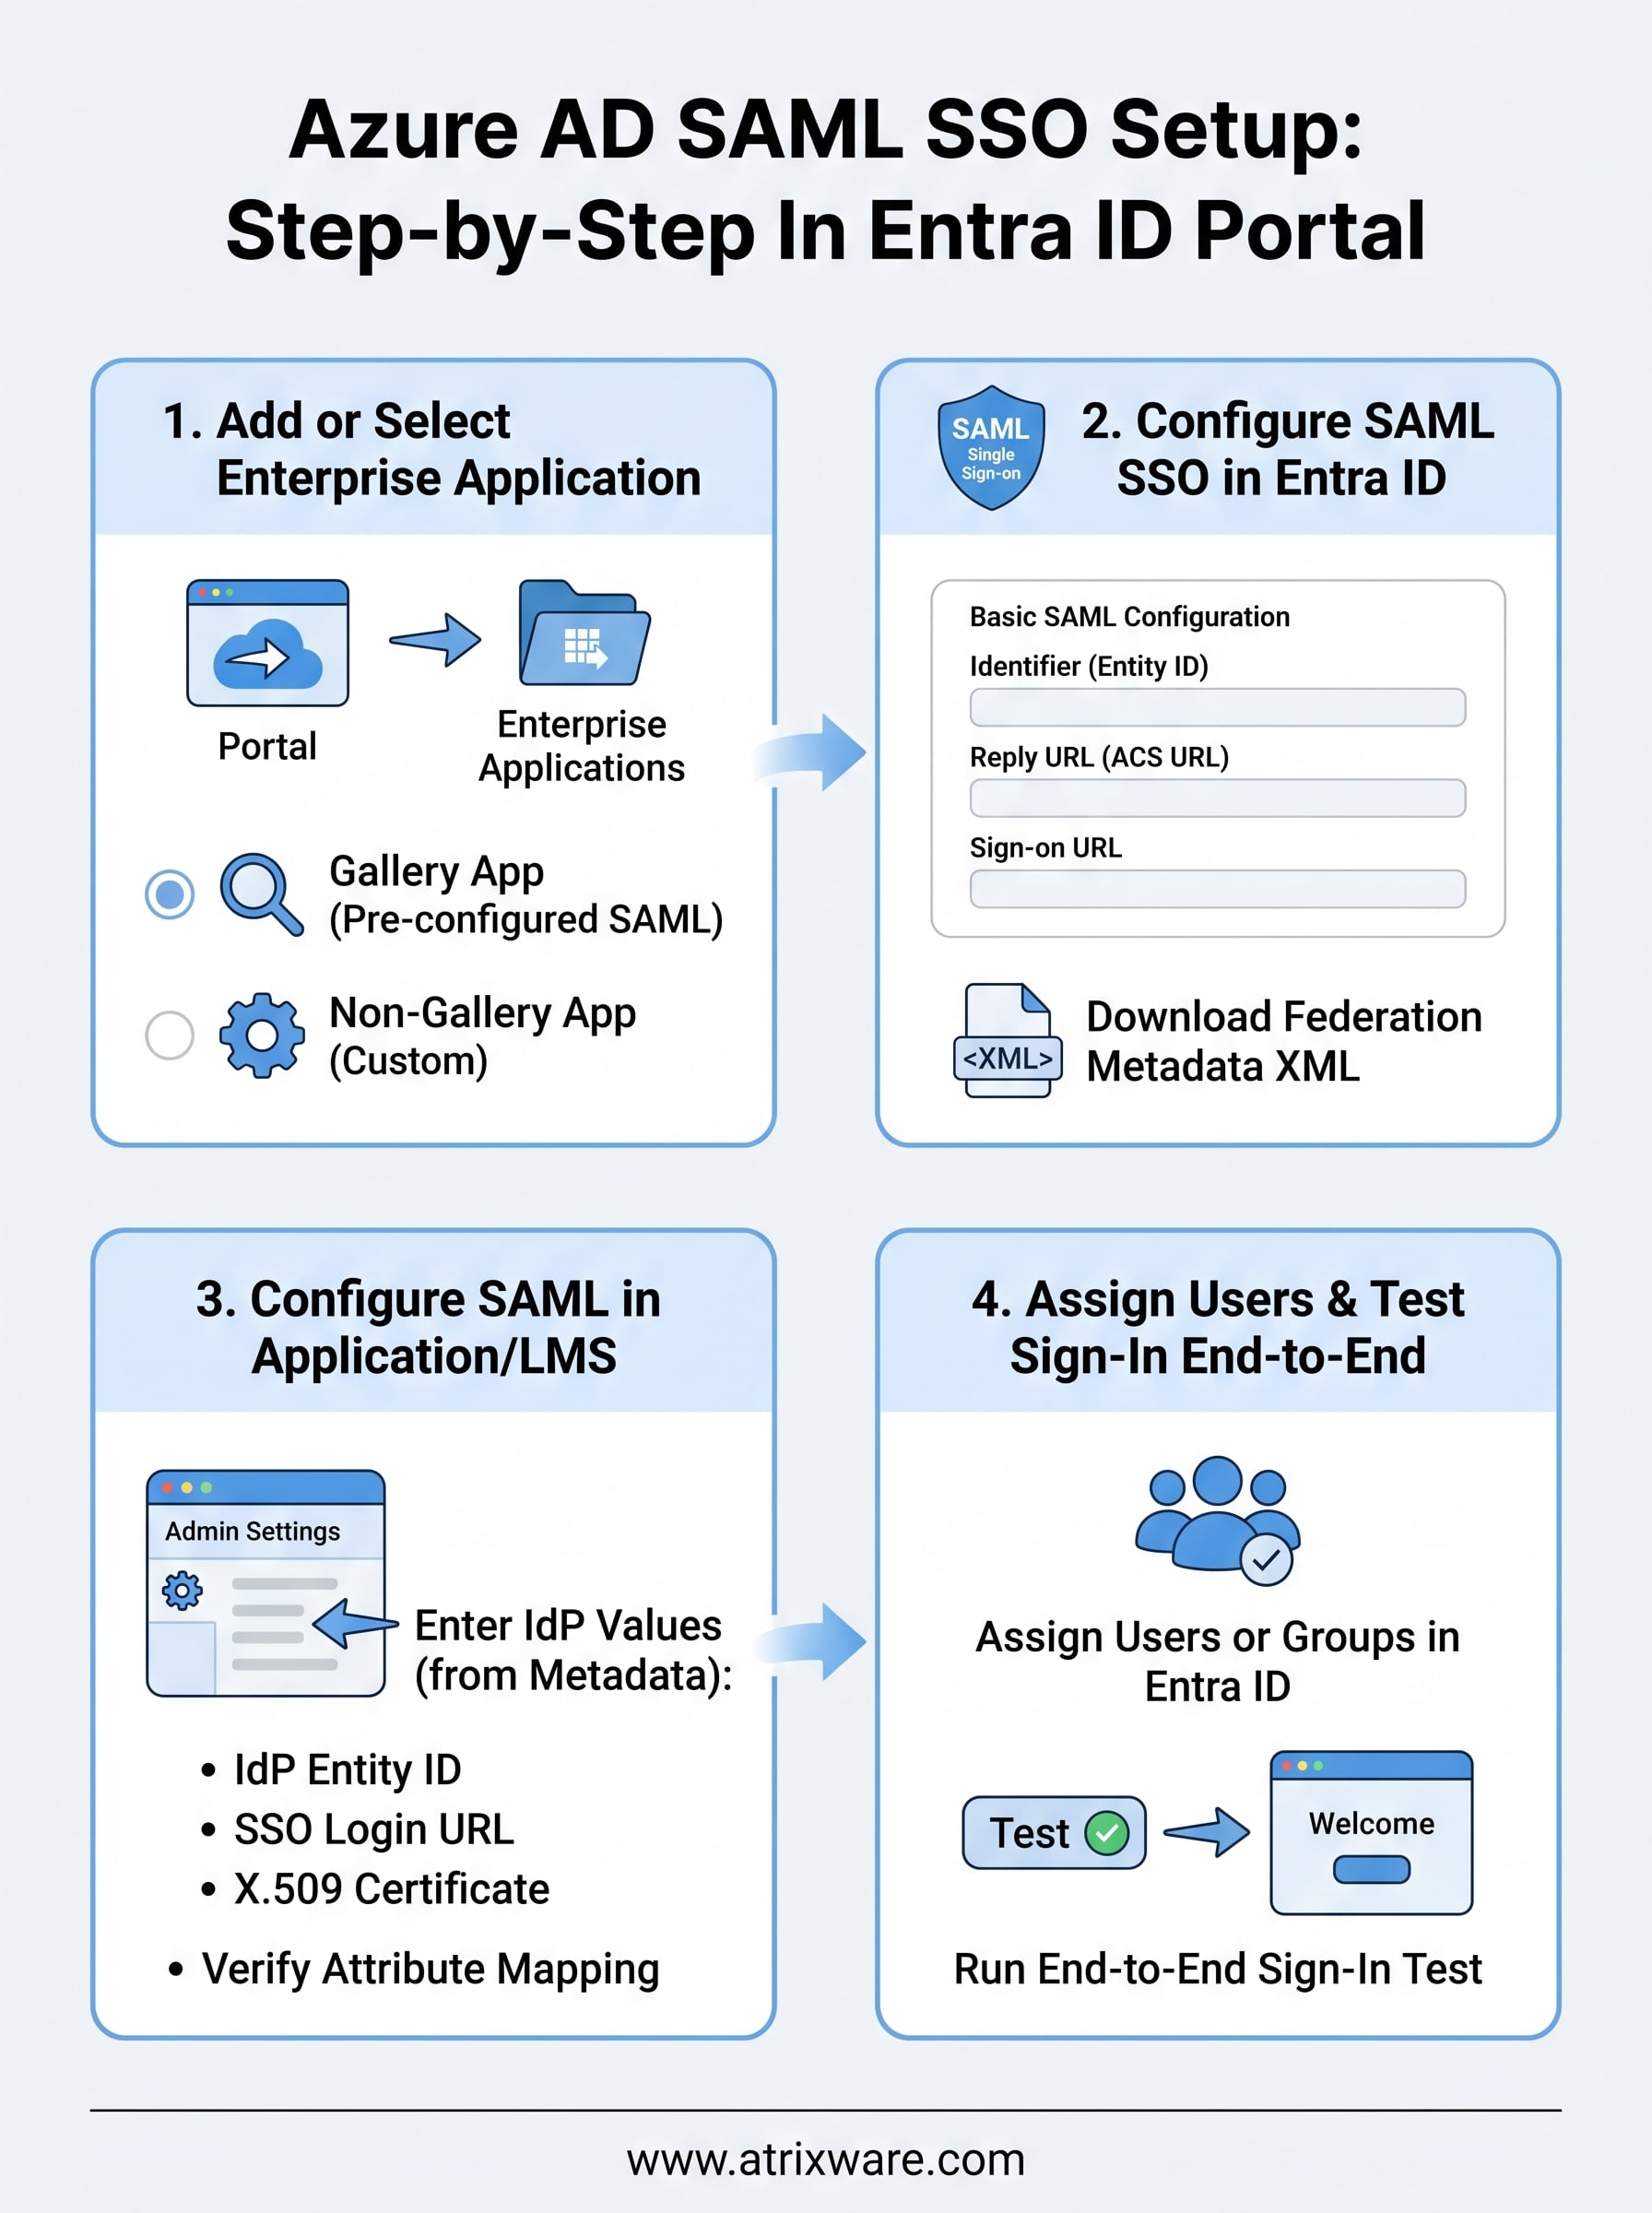
Step 1. Add or select the enterprise application
The first task in any azure ad saml sso setup is registering your application inside the Entra ID portal. This step creates the application object that holds all your SAML configuration, user assignments, and certificates. Without it, there is nothing to configure on the identity provider side.
Navigate to Enterprise Applications
Sign in to the Microsoft Entra ID portal with your administrator account. Follow this path to reach the correct location:
- Select Identity from the left navigation panel.
- Expand Applications and click Enterprise applications.
- Review the list of all apps currently registered in your tenant.
If you do not see an application you expect to find here, confirm your account holds the Application Administrator role or higher before continuing.
Add or locate your application
Click New application at the top of the Enterprise applications page to open the gallery. Type your application’s name in the search box. Gallery applications like Salesforce or Workday come with pre-populated SAML fields, which reduces manual entry errors and speeds up configuration. Select the matching app and click Create.

For non-gallery applications such as a custom LMS or an internal tool, select "Create your own application," enter a display name, choose "Integrate any other application you don’t find in the gallery," and click Create. Your application object now exists in the tenant and is ready for the SAML configuration steps that follow.
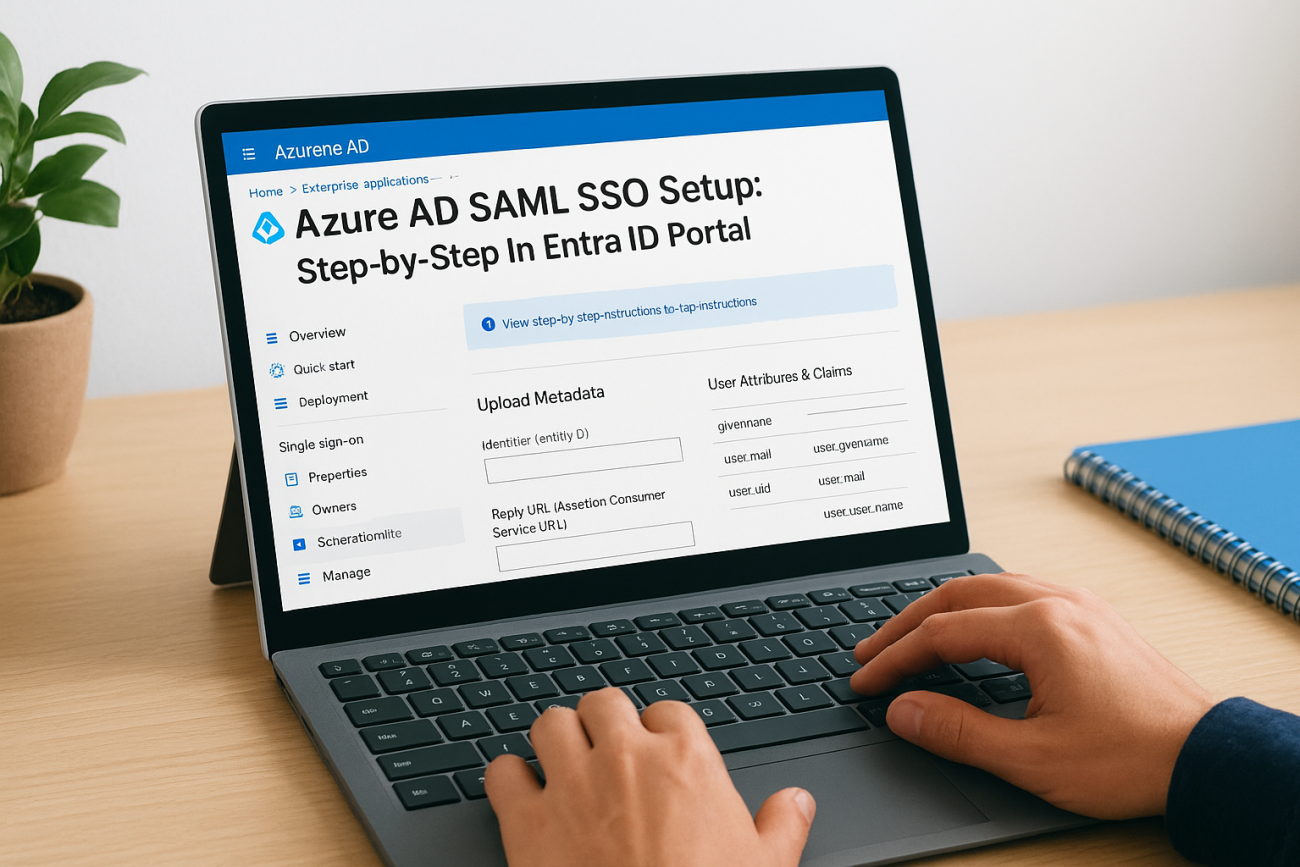
Step 2. Configure SAML single sign-on in Entra ID
With your application object created, the next stage of your azure ad saml sso setup is entering the SAML configuration values. Open your application in the Entra ID portal and select Single sign-on from the left menu, then choose "SAML" as the sign-on method to load the configuration panel.
Enter the basic SAML configuration
Click Edit inside the "Basic SAML Configuration" card to open the input form. Enter the values you collected before starting this process:
| Field | Value to enter |
|---|---|
| Identifier (Entity ID) | Provided by your service provider |
| Reply URL (ACS URL) | Provided by your service provider |
| Sign-on URL | The URL users visit to initiate login |
| Relay State | Optional; check your application docs |
Save the form when finished. Entra ID validates the URL format on save, so a malformed ACS URL will return an error before you can move forward.
Double-check the Entity ID and Reply URL for trailing slashes or extra spaces, as both cause SAML assertion failures at login time.
Download the federation metadata
Scroll down to the SAML Certificates section and click "Download" next to Federation Metadata XML. This file packages your identity provider’s public certificate and endpoint URLs that your application needs in Step 3.
Keep this file accessible. Some applications accept the XML file directly as an upload, while others require you to paste individual certificate values manually.
Step 3. Configure SAML in your application or LMS
With the federation metadata XML downloaded from Entra ID, you now switch sides and configure your application to trust Microsoft as the identity provider. This is where the two systems are linked, and where an incomplete azure ad saml sso setup most often breaks down.
Enter the IdP values into your application
Open your application’s SSO settings panel. Most applications, including Axis LMS, give you a dedicated SSO configuration section under admin settings. Depending on what your application supports, you will either upload the federation metadata XML file directly or enter the values manually. If you enter them manually, use these fields from your downloaded XML:
| Field in your application | Where to find it in the metadata XML |
|---|---|
| IdP Entity ID | entityID attribute on the EntityDescriptor tag |
| SSO Login URL | Location attribute on the SingleSignOnService tag |
| X.509 Certificate | Text inside the X509Certificate tag |
Save these settings before moving to the next step.
If your application accepts a metadata URL instead of a file, copy the App Federation Metadata URL from the SAML Certificates section in Entra ID and paste it directly into your application. This keeps the certificate updated automatically when it rotates.
Verify the attribute mapping
Your application needs to receive the correct user attributes in the SAML assertion. Confirm that the user.mail and user.userprincipalname claims in Entra ID match the fields your application expects for email and username. A mismatch here prevents successful login even when all URLs are correct.
Step 4. Assign users and test sign-in end to end
Configuration alone does not complete your azure ad saml sso setup. You must explicitly assign users or groups to the application in Entra ID before anyone can authenticate through it. Until you do this, even correctly configured accounts receive an access error at sign-in.
Assign users or groups to the application
Return to your enterprise application in the Entra ID portal and select "Users and groups" from the left menu. Click "Add user/group," search for the test account you prepared earlier, select it, and click "Assign." For production rollout, assign an Active Directory security group rather than individual users so you manage access at the group level going forward.

If your organization uses group-based licensing, assign the SSO application to the same group that holds the relevant Entra ID license to avoid access mismatches.
Run the end-to-end sign-in test
Select "Test" from the Single sign-on configuration page in the Entra ID portal. Click "Test sign in" to launch a browser session using your assigned test account. Entra ID processes the SAML assertion and redirects you to your application. A successful test lands you on the application’s authenticated home screen without a separate login prompt.
If the test fails, the error message identifies the broken step. Check the ACS URL, Entity ID, and certificate values first, as these three fields cause the majority of SAML assertion failures.
Wrap up and what to do next
You now have a complete azure ad saml sso setup running in Microsoft Entra ID, with users assigned, metadata exchanged, and a successful end-to-end test behind you. The process covers four concrete stages: adding your enterprise application, entering the basic SAML configuration, feeding the federation metadata into your application, and confirming access with a live sign-in test. Each stage builds on the previous one, so a problem at login almost always traces back to a value entered in one of the earlier steps.
From here, review your attribute mappings and group assignments as your user base grows, and set a reminder to rotate your SAML signing certificate before it expires. If you are evaluating an LMS that supports SAML SSO natively and integrates cleanly with Entra ID, try the Axis LMS admin demo to see the SSO configuration in a real training environment.