Not every learner moves through training at the same pace or needs the same content. Some already understand the basics and want to skip ahead. Others need extra practice before progressing. Traditional linear courses ignore these differences, forcing everyone down the same path regardless of their knowledge or goals. That’s where LearnDash adaptive learning comes in, giving you tools to create courses that respond to individual learner needs rather than treating everyone identically.
If you’re using LearnDash and want to build nonlinear course paths, you’ll quickly discover that the platform doesn’t include robust adaptive features out of the box. You’ll need plugins, add-ons, and some creative configuration to make it happen. The good news: several solutions exist that can transform your static courses into dynamic learning experiences. The challenge is knowing which ones actually work and how to implement them effectively.
At Atrixware, we’ve spent years building Axis LMS with adaptive capabilities and personalized learning paths baked in. That experience gives us perspective on what makes adaptive learning work, and what falls short. This guide walks you through the practical steps to add adaptive functionality to LearnDash, covering the plugins worth considering, configuration approaches, and workarounds for common limitations you’ll encounter along the way.
What LearnDash adaptive learning means
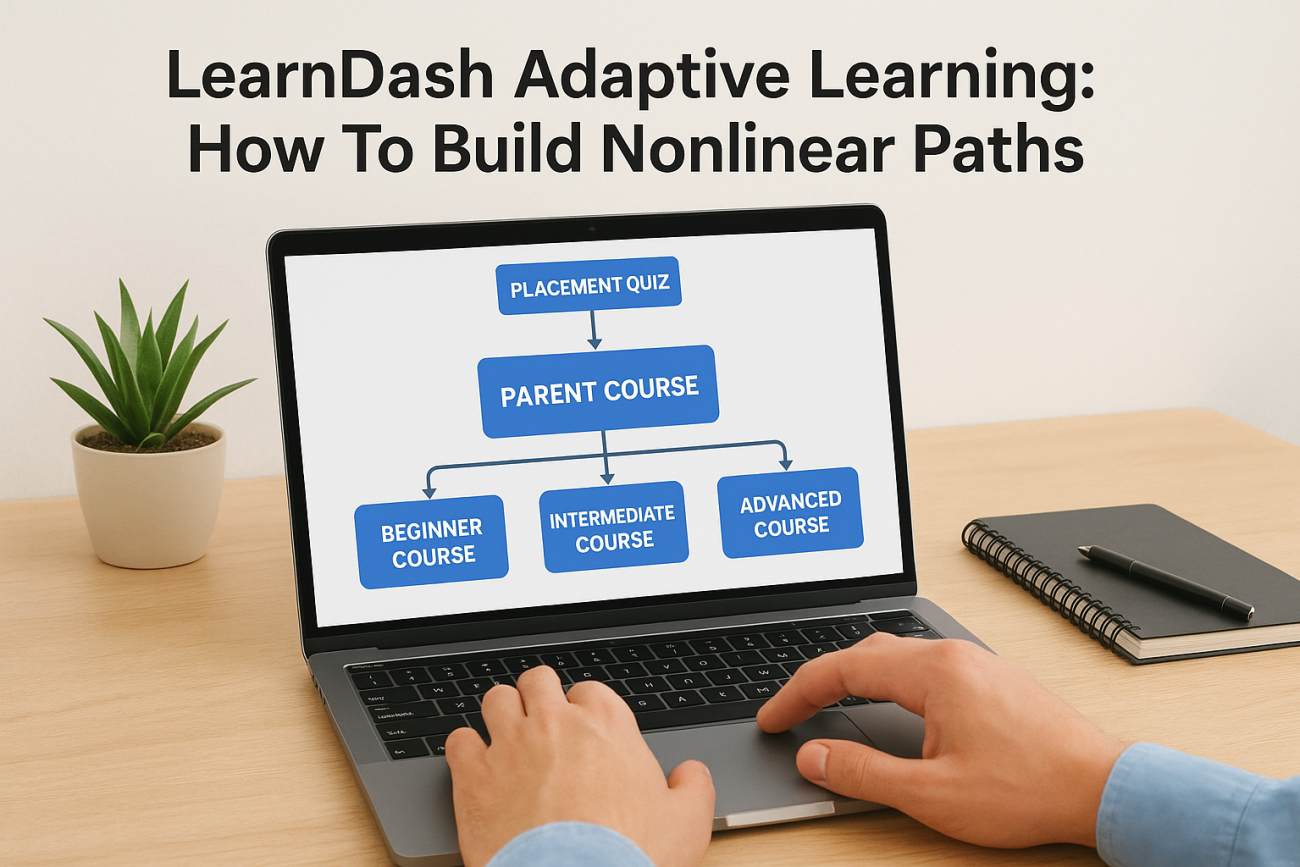
Adaptive learning adjusts the course path based on individual performance, prior knowledge, or preferences. Instead of forcing everyone through Module 1, then Module 2, then Module 3 in sequence, adaptive courses branch learners to different content based on their quiz results, assessments, or choices. A learner who scores high on a placement test might skip beginner material entirely. Someone who struggles with a concept gets routed to remedial content before moving forward.
What adaptive learning actually does
In practice, adaptive learning creates multiple paths through your training material. You might have three difficulty levels (beginner, intermediate, advanced) that learners enter based on an initial assessment. Or you could branch learners into specialized tracks depending on their role, department, or goals. The system automatically enrolls learners in the appropriate courses, lessons, or modules without manual intervention from an admin.
LearnDash adaptive learning relies on conditional logic tied to quiz performance or course completion status. When a learner completes a quiz, the system checks their score against predefined thresholds. Based on that score, it triggers enrollment in a specific course or unlocks certain lessons. This branching happens automatically, creating a personalized experience that responds to each learner’s demonstrated knowledge.
How it works in LearnDash
The platform itself doesn’t include sophisticated adaptive features by default. You get basic prerequisites (complete Course A before accessing Course B) and quiz pass requirements. But real adaptive functionality, where the system branches learners based on performance or automatically enrolls them in appropriate content, requires add-ons or plugins. That’s where tools like Uncanny Automator, AutomatorWP, or custom development come into play.
The key difference between basic prerequisites and true adaptive learning is automatic branching based on assessment results, not just linear unlocking.
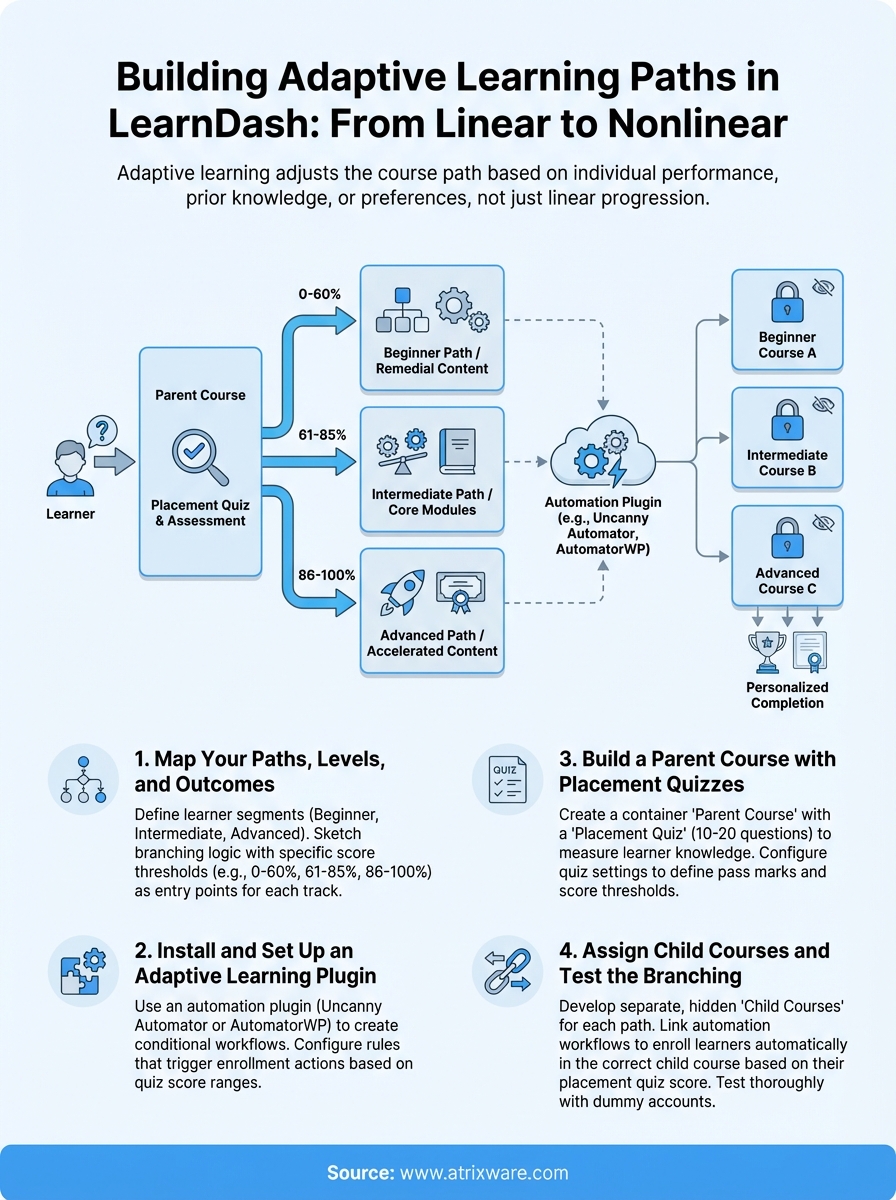
Step 1. Map your paths, levels, and outcomes
Before you install any plugins or configure LearnDash adaptive learning settings, you need a clear blueprint of how learners will move through your content. Start with a simple diagram or flowchart that shows every possible path a learner might take. This planning step prevents confusion later when you’re setting up conditional logic and branching rules.
Define your learner segments
Identify the different learner types who will take your course. You might segment by skill level (beginner, intermediate, advanced), job role (manager, technician, sales rep), or learning goals (certification, refresher, new hire onboarding). Write down 3-5 distinct segments maximum. More than that becomes difficult to manage and test effectively.
Sketch the branching logic
Draw out how learners enter each path and what triggers the branching. Most adaptive courses use a placement quiz at the start. Decide what score ranges send learners to which tracks. For example: scores 0-60% go to beginner content, 61-85% to intermediate, 86-100% skip to advanced. Document these exact thresholds now because you’ll need them when configuring your automation rules.
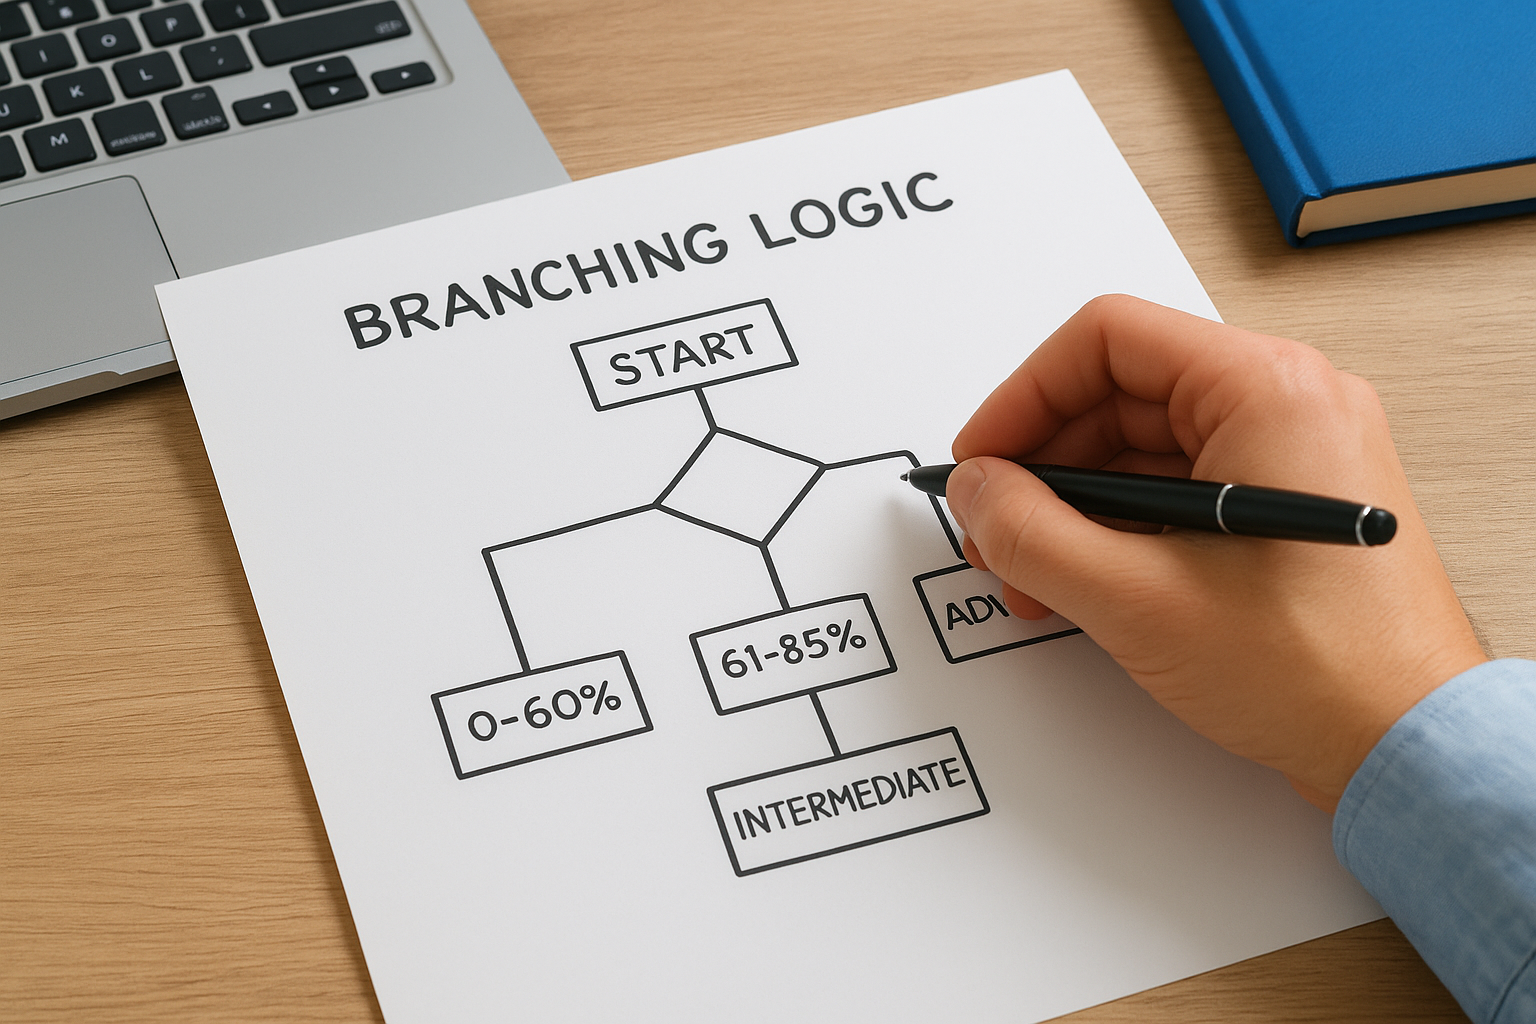
Your branching map should include entry points, decision nodes, and exit criteria for every possible learner journey through your content.
Step 2. Install and set up an adaptive learning plugin
You need an automation plugin to handle the branching logic for LearnDash adaptive learning. The platform itself won’t automatically enroll learners or trigger course access based on quiz scores without additional tools. Two plugins dominate this space: Uncanny Automator and AutomatorWP. Both let you create conditional workflows that respond to LearnDash events like quiz completion or course progress.
Choose your automation tool
Uncanny Automator offers the most robust LearnDash integration with triggers for quiz scores, lesson completion, and course enrollment. The free version gives you basic functionality, but you’ll need the pro version for advanced branching with multiple conditions. Install it from your WordPress dashboard, then connect it to LearnDash through the integrations panel. The setup process takes about five minutes and requires no coding.
Automation plugins bridge the gap between LearnDash’s basic functionality and true adaptive learning capabilities.
Configure your first workflow
Create a new recipe in your automation tool that triggers when a learner completes your placement quiz. Set conditions based on score ranges you defined in Step 1. For example: if the quiz score is between 0-60%, automatically enroll the learner in "Beginner Course A." Test this workflow with a dummy learner account before rolling it out to real users.
Step 3. Build a parent course with placement quizzes
You need a container course that serves as the entry point for your learndash adaptive learning system. This parent course holds the placement quiz that determines which child courses learners access. Create a new course in LearnDash and give it a name like "Training Assessment" or "Skill Level Placement." Don’t add regular lessons to this course. Its sole purpose is routing learners to the right path.
Build your placement quiz
Add a new quiz to your parent course with questions that accurately measure learner knowledge across your content. Include 10-20 questions that cover the full range of topics from beginner to advanced. Set the quiz to show results immediately so learners understand where they placed. Configure the quiz settings to allow only one attempt to prevent gaming the system.

Configure score ranges
Define specific score thresholds that trigger different paths. Go to your quiz settings and add pass marks for each level you planned in Step 1. For example, set passing scores at 60% (beginner), 80% (intermediate), and 95% (advanced). These exact numbers become trigger values in your automation plugin. Write down each threshold because you’ll reference them when building your enrollment workflows in the next step.
Your placement quiz acts as the decision engine that powers the entire adaptive system, so test it thoroughly before launching.
Step 4. Assign child courses and test the branching
Connect your automation workflows to specific child courses that match each skill level you defined. This step transforms your placement quiz results into automatic enrollment actions that route learners to the right content. You’ll create separate courses for each level (beginner, intermediate, advanced), then link them to your automation triggers through conditional logic.
Create your child courses
Build distinct courses for each learner path you mapped in Step 1. Name them clearly so your automation rules make sense later (for example: "Sales Training – Beginner Level" or "Advanced Leadership Module"). Add the actual training content (lessons, topics, quizzes) to these courses. Set each child course to hidden or private in your LearnDash settings so learners can’t manually enroll. Only your automation workflows should grant access.
Link automation to enrollment
Return to your automation plugin and complete the workflows you started in Step 2. For each score range trigger, add an enrollment action that registers learners in the corresponding child course. Test every path by creating dummy accounts with different email addresses, taking the placement quiz multiple times with varying scores, and confirming each account gets enrolled in the correct course. Check your automation logs to verify the workflows fired properly.
Always test with real quiz attempts at each threshold boundary (exactly 60%, 61%, etc.) to catch edge cases in your branching logic.
Next steps
You’ve built the foundation for learndash adaptive learning by mapping paths, installing automation tools, creating placement quizzes, and configuring branching logic. The next phase involves monitoring learner progress through your new system and refining the branching thresholds based on real data. Watch your automation logs for failed enrollments or learners who get stuck between paths.
Plan to review quiz analytics monthly to see if your score thresholds accurately sort learners into appropriate levels. You might discover that too many learners land in beginner courses, suggesting your placement quiz needs harder questions or adjusted passing scores.
If you’re finding LearnDash’s adaptive capabilities limited even with plugins, consider platforms like Axis LMS that include robust branching and personalization features by default. Take our LMS readiness quiz to evaluate whether your training needs have outgrown what LearnDash can deliver.