
You have knowledge that others need. You see people struggling with problems you can solve. But when you sit down to figure out how to create an online course, the process feels overwhelming. Should you film everything first? Which platform? How much to charge? You end up stuck before you even start, watching your expertise gather dust while others launch courses that look half as good as what you could make.
The truth is you don’t need fancy equipment or a massive audience to build a profitable course. You need a clear framework that guides you from idea to launch without wasting time on features nobody uses. The most successful course creators follow a proven sequence that validates demand early, builds content efficiently, and scales without burning out.
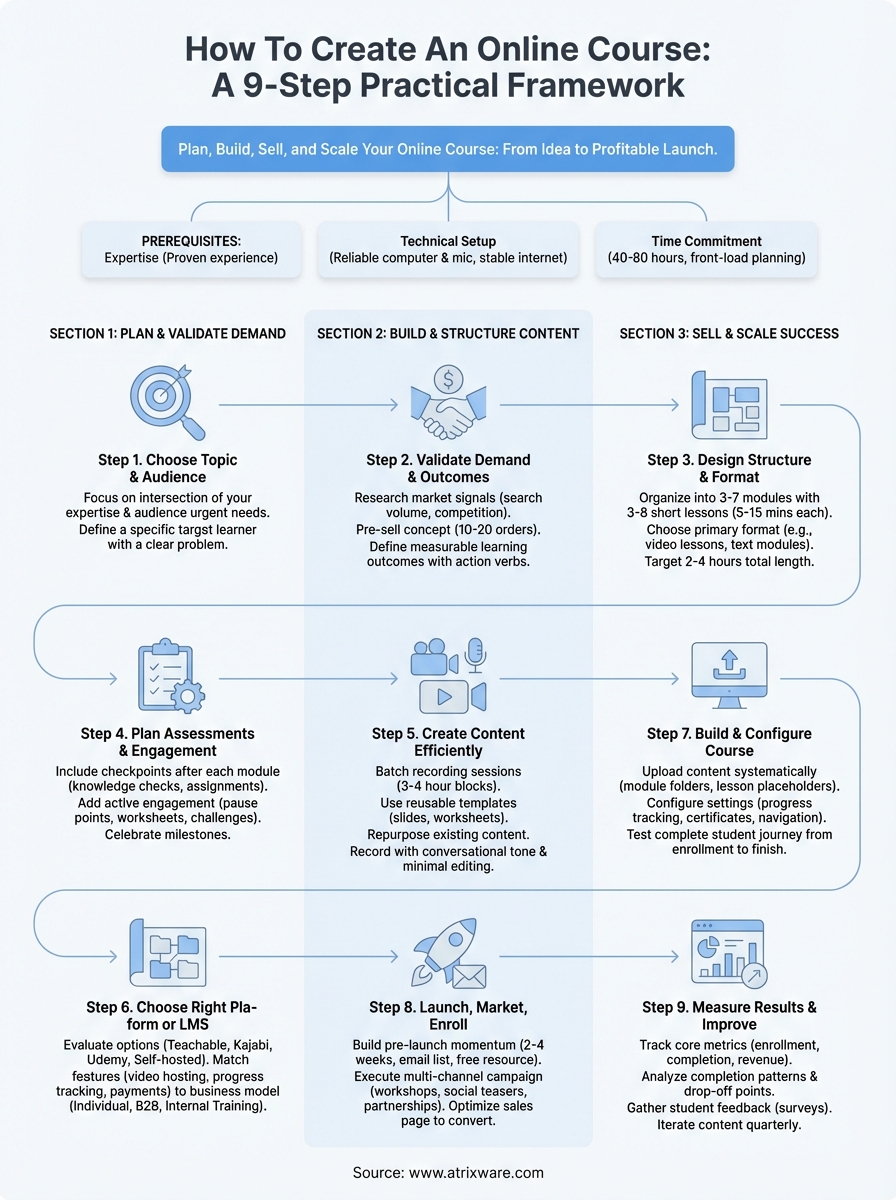
This guide walks you through nine practical steps to plan, build, sell, and scale your online course. You’ll learn how to validate your topic before investing time, structure content that keeps learners engaged, choose the right platform for your needs, and launch with confidence. Whether you’re creating your first course or your tenth, this framework helps you avoid common mistakes and focus on what actually drives results.
Prerequisites for creating your course
Before you dive into how to create an online course, you need three foundational elements in place. Your expertise in a specific subject, your basic technical setup, and your realistic time commitment determine whether you can build and launch successfully. Most people overestimate the equipment they need and underestimate the time required for content planning.
Subject matter expertise
You don’t need a formal degree to teach online, but you do need proven experience that delivers results. Your expertise can come from professional work, personal achievements, or years of solving a specific problem. The key question is simple: have you helped others succeed in this area, either formally or informally?
Consider these valid forms of expertise:
- Professional skills you use daily in your career
- Personal transformations you’ve achieved and can replicate
- Hobbies where you’ve reached an advanced level
- Problems you’ve solved repeatedly for friends or colleagues
Basic technical setup
Your technical requirements are simpler than you think. You need a reliable computer, a decent microphone (even a smartphone headset works initially), and a stable internet connection. Skip the expensive camera gear and studio lighting until you validate your course sells.
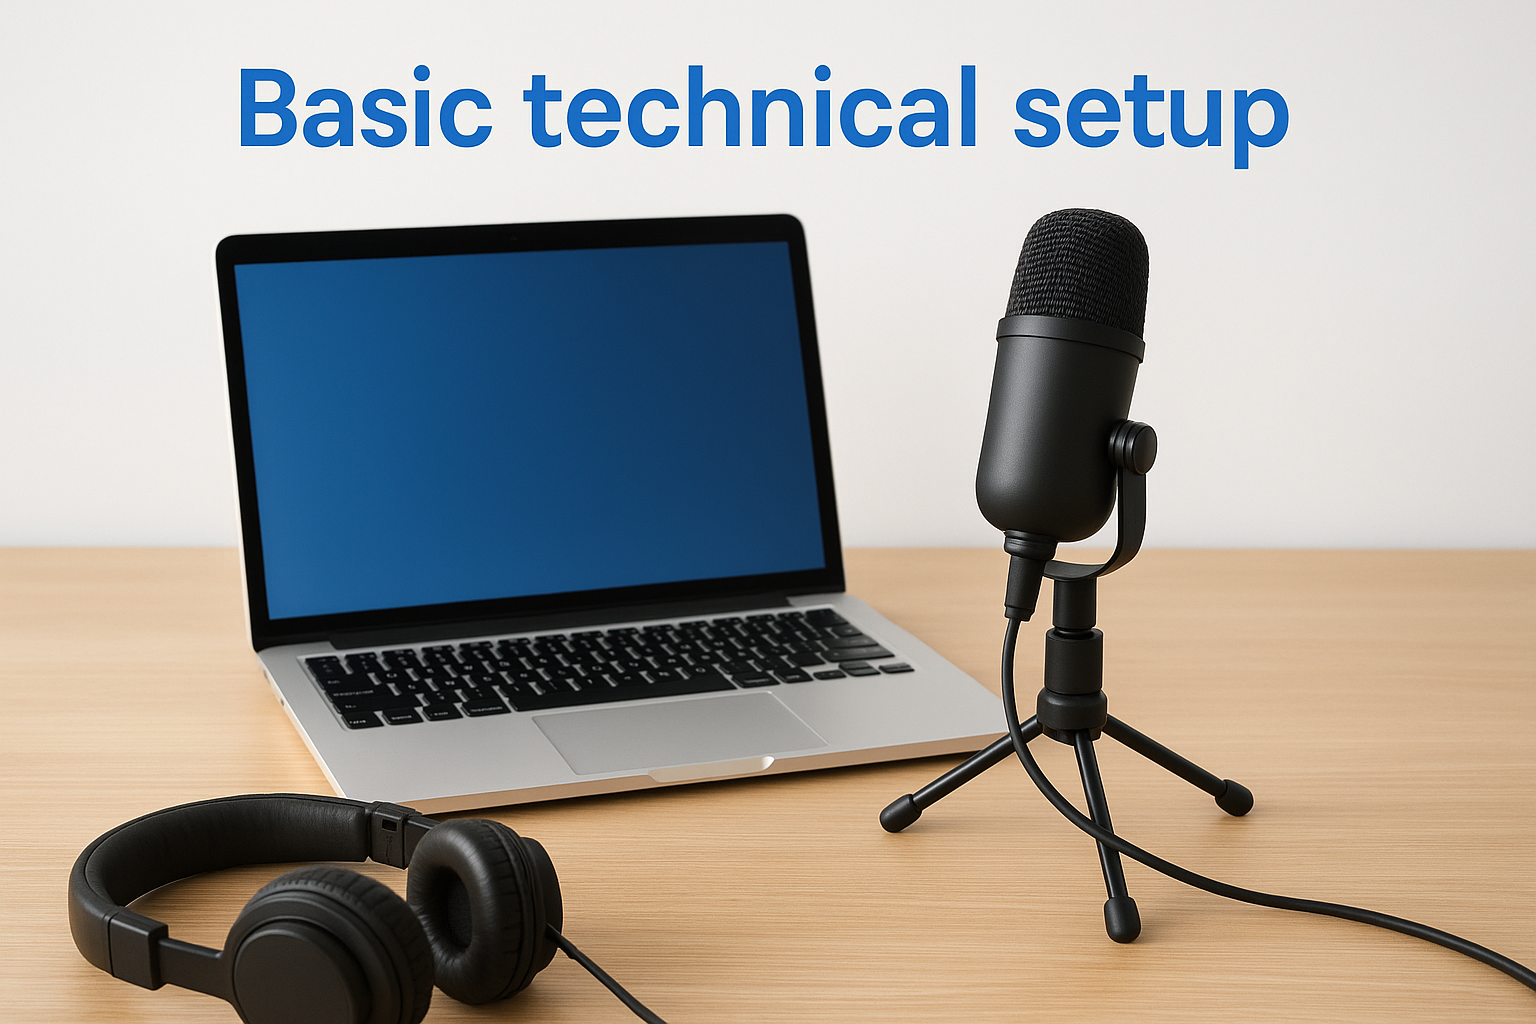
Most successful course creators start with equipment they already own and upgrade only after generating revenue.
Start with these minimum requirements:
- Computer capable of running video recording software
- Microphone that captures clear audio without background noise
- Screen recording tool (many free options exist)
- Basic video editing software or platform with built-in editing
Time commitment
Plan for 40 to 80 hours to create your first course from start to finish. This includes planning your structure, creating content, recording videos, setting up your platform, and preparing your launch materials. Front-load your time in the planning phase to avoid endless revisions later.
Break your timeline into these realistic phases:
- Planning and validation: 8-12 hours
- Content creation: 20-40 hours
- Recording and editing: 10-20 hours
- Platform setup and testing: 5-10 hours
- Launch preparation: 3-5 hours
Step 1. Choose a course topic and audience
Your course topic determines everything that follows, so you need to make this decision strategically. The best course topics sit at the intersection of your expertise and your audience’s urgent needs. This isn’t about what you want to teach; it’s about what people will pay to learn because it solves a specific problem or helps them achieve a measurable goal.
Start by listing problems you solve consistently in your work or personal life. Your ideal topic should be specific enough to stand out but broad enough to attract sufficient buyers. Instead of "marketing," consider "email marketing for e-commerce stores." Instead of "photography," think "product photography for online sellers."
Identify your expertise sweet spot
You want a topic where you have documented results that you can replicate through teaching. Look for areas where people already ask you questions, where you’ve achieved something others struggle with, or where you’ve developed a unique approach that delivers faster or better outcomes than standard methods.
Answer these questions to narrow your focus:
- What skill do colleagues or friends ask you to help them with?
- What problem have you solved multiple times with consistent success?
- What knowledge gap did you struggle to fill when you were learning?
- What topic could you confidently teach without extensive research?
Define your target learner
Your course succeeds when you speak directly to a specific person with a specific problem. Create a detailed profile of your ideal learner that includes their current skill level, their goals, what they’ve tried before, and why previous solutions failed them.
Consider these learner characteristics:
- Current position or role (job title, business stage, experience level)
- Specific challenge they face daily
- Desired outcome they want to achieve
- Timeline pressure or urgency
- Budget constraints or willingness to invest
The more specific your target learner, the easier every subsequent decision becomes, from pricing to platform selection to marketing messages.
Test topic viability
Before you invest time in how to create an online course, verify that people actually want what you plan to teach. Search for your topic on course marketplaces, check if competitors exist (they should), and look for active discussions in relevant communities. Zero competition often means zero demand, not a blue ocean opportunity.
Run these quick validation checks:
- Search your topic on existing course platforms to gauge competition
- Join relevant online communities and observe what questions repeat
- Survey your network about what they would pay to learn
- Check if similar books or resources already sell successfully
Step 2. Validate demand and learning outcomes
You need proof that people will pay for your course before you spend weeks creating it. Validation saves you from building something nobody wants and helps you refine your concept based on real feedback. This step separates successful course creators from those who waste months on content that never sells because they skipped market research.
Research your market signals
Look for existing demand indicators rather than hoping demand exists. Check if people already search for your topic, if competitors sell similar courses, and if communities actively discuss the problems you plan to solve. Strong market signals include recurring questions in forums, paid courses already selling, and people actively seeking solutions.
Search these specific places for validation:
- Course marketplaces (check pricing and review counts for similar topics)
- Reddit threads and Quora questions related to your subject
- Facebook groups where your target audience gathers
- YouTube videos (view counts and engagement on related tutorials)
- Amazon books in your category (sales rank and review volume)
High competition proves demand exists, while zero competition often signals a topic people won’t pay to learn.
Pre-sell your course concept
The strongest validation comes from people paying you before you create the full course. Build a simple landing page that describes your course topic, who it helps, what outcomes they’ll achieve, and offer a discounted pre-sale price. If you can secure 10 to 20 pre-orders, you’ve validated genuine demand worth pursuing.
Create your pre-sale offer with these elements:
- Clear course title and one-sentence description
- Specific problem it solves for your target learner
- Three to five key outcomes students will achieve
- Outline of main modules or sections you’ll include
- Special pricing for early buyers (30% to 50% discount)
- Expected delivery date (give yourself buffer time)
Define measurable learning outcomes
Your learning outcomes tell potential buyers exactly what they’ll be able to do after completing your course. Write outcomes that start with action verbs and describe specific, measurable skills or knowledge. Avoid vague promises like "understand marketing" and instead write "create a 30-day content calendar that drives traffic."
Use this template to write your outcomes:
After completing [Course Name], you will be able to:
- [Action verb] [specific task] [measurable result]
- [Action verb] [specific task] [measurable result]
- [Action verb] [specific task] [measurable result]
Example for a product photography course:
After completing Product Photography Fundamentals, you will be able to:
- Photograph products with professional lighting using only $50 in equipment
- Edit product images in 5 minutes each to meet marketplace standards
- Create a consistent visual style across 20+ product listings
Strong outcomes help you stay focused when you learn how to create an online course because they guide every content decision you make during development.
Step 3. Design your course structure and format
Your course structure determines whether students finish or abandon halfway through, so you need to organize content in a logical progression that builds momentum rather than overwhelms. When you figure out how to create an online course that people complete, structure matters more than production quality. A well-structured course with simple videos outperforms a beautiful course with confusing organization every time.
Choose your course delivery format
You need to decide how students will consume your content before you start creating it. Your format should match both your teaching style and your audience’s learning preferences. Most successful courses combine multiple formats rather than relying on a single approach, but you should identify one primary format that carries the bulk of your teaching.
Consider these proven delivery formats:
- Video lessons with slides or screen recordings (most popular format)
- Text-based modules with images, diagrams, and examples
- Audio lessons paired with downloadable worksheets
- Live cohort sessions recorded and made available afterward
- Mixed format combining short videos with written resources
The format you choose should minimize friction for your target learner, not showcase your production capabilities.
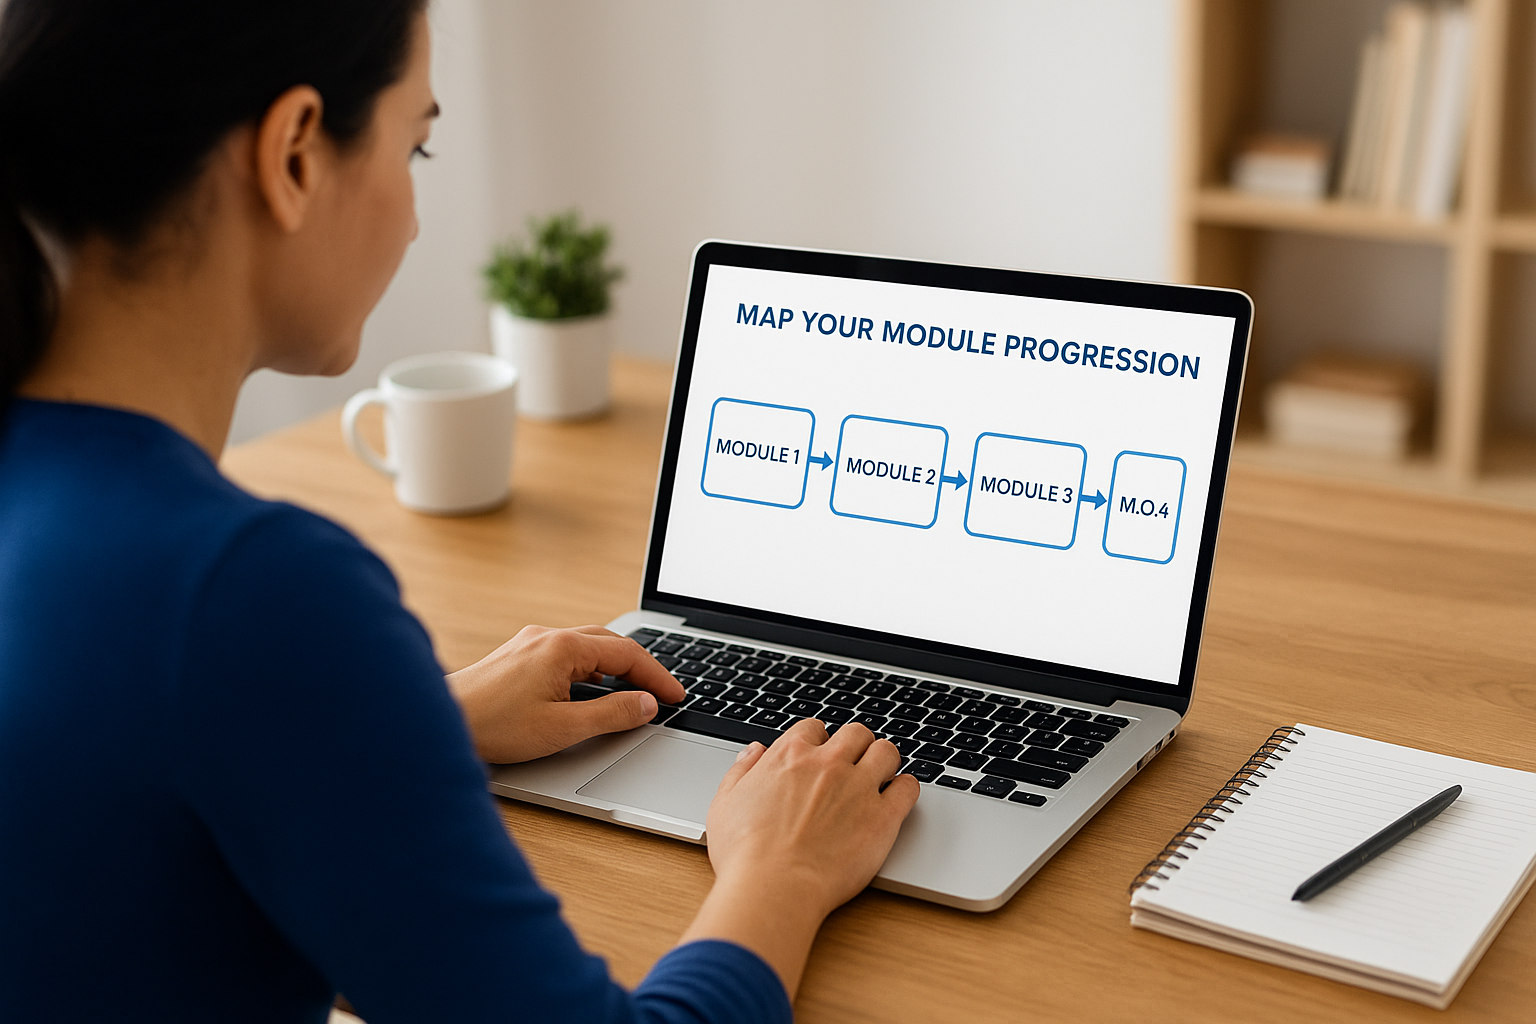
Map your module progression
Break your course into three to seven modules that each focus on one major concept or skill. Each module should contain three to eight lessons that students can complete in 5 to 15 minutes each. This structure keeps students moving forward and creates natural stopping points that prevent fatigue.
Structure your modules using this proven framework:
Module 1: Foundation (set context and teach core concepts)
Module 2-3: Core Skills (teach main techniques step by step)
Module 4-5: Advanced Application (show how to handle complexity)
Module 6: Implementation (guide students through real-world use)
Module 7: Troubleshooting (address common problems and mistakes)
Example for an email marketing course:
Module 1: Email Marketing Fundamentals
  - Lesson 1: Why email outperforms social media
  - Lesson 2: Choosing your email platform
  - Lesson 3: Building your first signup form

Module 2: Growing Your List
  - Lesson 1: Creating lead magnets that convert
  - Lesson 2: Optimizing signup page copy
  - Lesson 3: Running basic Facebook ads to your list
Balance content depth and completion rates
Your instinct will push you to include everything you know, but shorter courses with higher completion rates generate better results than comprehensive courses most students abandon. Target a total course length of 2 to 4 hours for most topics, knowing you can always create an advanced follow-up course later.
Apply these content guidelines:
- Keep individual video lessons under 10 minutes
- Limit reading materials to 500-800 words per lesson
- Include one main takeaway per lesson
- Remove tangents that don’t serve your core learning outcomes
- Save advanced topics for bonus modules students can skip
Students who complete your course become your best promoters and most likely buyers for future offerings, so prioritize completion over comprehensiveness when making structure decisions.
Step 4. Plan assessments and engagement
You need to plan how you’ll measure learning and keep students engaged before you start creating content. Assessments prove students learned what you promised, while engagement mechanisms prevent the dropout that plagues most online courses. When you understand how to create an online course that students actually finish, you build these elements into your structure from day one rather than adding them as afterthoughts.
Design progress checkpoints
Your assessments should happen at regular intervals throughout your course, not just at the end. Place a checkpoint after each module that confirms students mastered the core concept before moving forward. These checkpoints can range from simple knowledge checks to practical assignments that produce real deliverables.
Structure your assessment strategy using these checkpoint types:
Knowledge checks: 3-5 multiple choice questions after each lesson
Skill demonstrations: Students submit work samples or screenshots
Reflection prompts: Short written responses about application
Peer reviews: Students evaluate and comment on each other's work
Final project: Students create something using all learned skills
Students who complete assessments show 3x higher course completion rates than those who skip them because checkpoints create accountability and momentum.
Build active engagement touchpoints
Plan specific moments where students interact with content rather than passively consuming it. Include at least one engagement activity per module that requires students to pause the video, apply a concept, or share their progress. Active participation transforms information into skills and keeps students moving through your material.
Implement these proven engagement tactics:
- Pause points in videos where students complete a specific task
- Downloadable worksheets that accompany each lesson
- Discussion prompts that encourage students to share results
- Challenges that push students to practice between lessons
- Accountability check-ins via email or community posts
Create milestone celebrations
Break your course into clear milestones that students can celebrate when they reach them. Award a completion certificate at the end, but also recognize progress at 25%, 50%, and 75% completion. Recognition drives continued participation and gives students tangible proof of their investment and progress through your material.
Mark these milestone moments throughout your course:
- Module completion badges that unlock sequentially
- Progress bar that shows percentage completed
- Congratulation messages after major sections
- Final certificate with student name and completion date
Step 5. Create content efficiently and at scale
You need a content production system that lets you create high-quality course materials without spending six months perfecting every slide. Most course creators waste time because they approach content creation reactively instead of following a repeatable process. When you master how to create an online course efficiently, you focus on teaching clarity rather than production perfection.
Batch your recording sessions
Schedule dedicated blocks of 3 to 4 hours where you record multiple lessons back-to-back instead of spreading production across weeks. Set up your equipment once, get into teaching mode, and capture 8 to 12 short lessons in a single session. This approach maintains consistent energy across your content and eliminates the friction of repeated setup.
Follow this batching workflow for maximum efficiency:
Session Prep (30 minutes):
- Review lesson outlines and talking points
- Set up recording equipment and test audio
- Prepare any slides or screen shares
- Close unnecessary programs and silence notifications

Recording Block (2-3 hours):
- Record 8-12 lessons with 5-minute breaks between each
- Keep takes loose and conversational (don't aim for perfection)
- Note timestamps for major errors that need editing

Post-Session (30 minutes):
- Back up all raw footage immediately
- Create a simple edit list for problem areas
- Move to next batch without detailed editing
Recording in batches reduces your total production time by 40% to 60% compared to spreading sessions across multiple days.
Build reusable content templates
Create standard templates for slides, worksheets, and other course materials that maintain visual consistency without requiring design decisions for every new piece. Your templates should include placeholders for common elements so you spend time on content rather than formatting during creation.
Develop these essential template types:
- Slide deck template with title slide, content slides, and summary slide layouts
- Worksheet template with your branding, instructions section, and work area
- Checklist template for step-by-step processes
- Resource list template that you update with relevant links
- Email template for lesson reminders and engagement prompts
Repurpose what you already created
Mine your existing content for course materials before creating everything from scratch. That presentation you delivered last month, those blog posts explaining your process, and those client documents you wrote all contain teaching material you can adapt. Transform these assets into course-ready content with minor modifications rather than starting with a blank page.
Look for these repurposing opportunities:
- Convert blog posts into lesson scripts or reading materials
- Transform webinar recordings into module videos
- Adapt client training documents into course worksheets
- Turn frequently asked questions into troubleshooting lessons
- Rebuild social media threads into structured lesson outlines
Record with minimal editing needs
Speak directly to your learner using a conversational tone that sounds natural rather than scripted. Accept minor stumbles and verbal tics instead of pursuing perfect takes that require hours of editing. Students prefer authentic teaching over polished productions, and imperfect recordings that clearly explain concepts outperform slick videos that confuse viewers.
Apply these recording best practices:
- Write bullet points instead of full scripts to maintain natural delivery
- Pause for 3 seconds when you make a mistake, then restart that sentence
- Keep videos under 8 minutes so small errors matter less
- Use your natural speaking pace rather than slowing down artificially
- Record standing up to maintain higher energy throughout sessions
Step 6. Choose the right platform or LMS
Your platform decision affects everything from student experience to your ability to scale, so you need to evaluate options based on specific criteria rather than popularity or features you’ll never use. The right platform makes creating and delivering your course straightforward while the wrong one creates technical frustration that pulls focus away from teaching. Most course creators choose platforms based on what others recommend without considering their unique business model and technical comfort level.
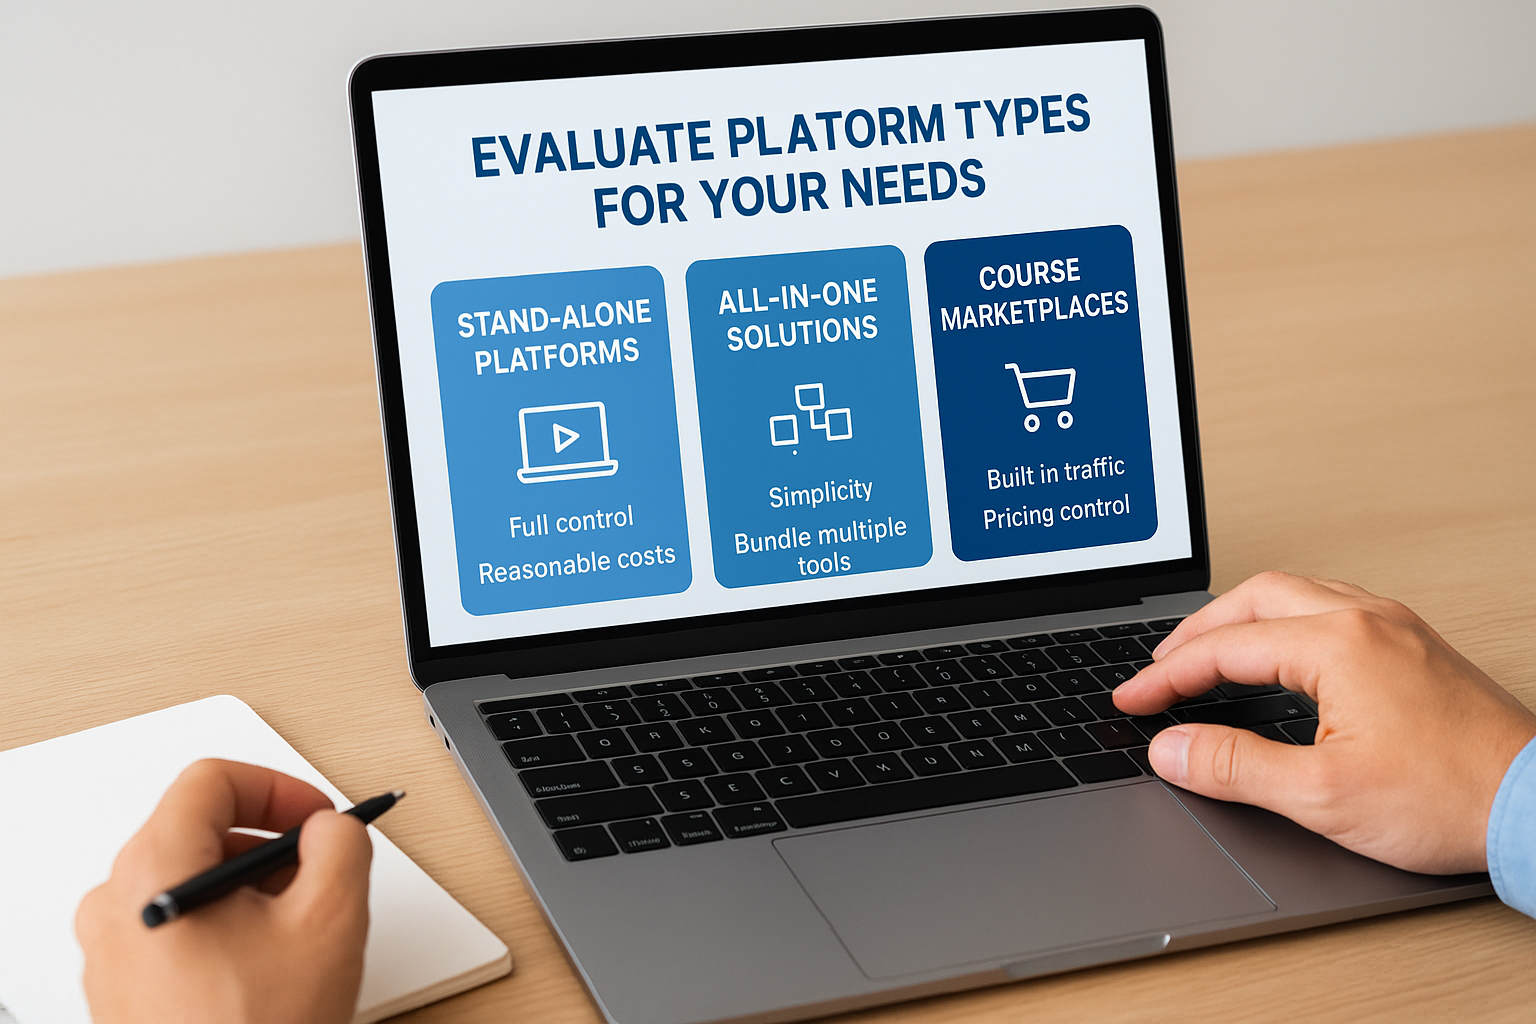
Evaluate platform types for your needs
You have three main platform categories to consider, each with distinct advantages and limitations. Stand-alone course platforms like Teachable or Thinkific give you control over branding and student data without requiring technical expertise. All-in-one solutions like Kajabi bundle your website, email marketing, and course delivery into a single system but typically cost more. Course marketplaces like Udemy provide built-in traffic but limit your pricing control and student relationships.
Compare these platform types against your priorities:
- Stand-alone platforms work best when you want full control with reasonable costs
- All-in-one solutions fit when you prefer simplicity over managing multiple tools
- Marketplaces make sense when you need immediate traffic and don’t mind revenue sharing
- Self-hosted LMS options suit organizations with technical resources and specific compliance requirements
Assess critical features before committing
Focus on the must-have capabilities that directly impact your ability to deliver results rather than getting distracted by advanced features you might use someday. Your platform needs to handle your primary content format smoothly, whether that’s video, text, or downloadable resources. Test the student experience from enrollment through course completion before you commit because your learners will judge your teaching quality partly based on platform usability.
Platform features matter less than platform reliability because students blame you when technical problems disrupt their learning experience.
Verify these essential capabilities in any platform you consider:
- Native video hosting without file size restrictions that force workarounds
- Mobile-friendly interface that works across devices without separate apps
- Progress tracking that shows students how far they’ve advanced
- Certificate generation upon completion with customization options
- Basic analytics showing enrollment, completion rates, and engagement patterns
- Payment processing that accepts your target market’s preferred methods
Match platform to your business model
Your revenue strategy determines which platform features actually matter when you learn how to create an online course that generates income. If you plan to sell to individuals, prioritize platforms with strong checkout experiences and marketing integrations. If you’re focused on B2B sales, look for bulk licensing capabilities and user management tools. Organizations running internal training need platforms with robust reporting and compliance features rather than marketing tools.
Consider these business model requirements:
- Individual sales require abandoned cart recovery and affiliate program support
- Corporate training needs SCORM compliance and detailed tracking reports
- Membership models benefit from subscription billing and content dripping
- Free courses with upsells need seamless integration between products
Step 7. Build and configure your course
You need to transform your recorded content and planned structure into a functioning course that students can navigate smoothly. This step involves uploading your materials systematically, configuring platform settings that affect the student experience, and testing everything before your first learner enrolls. Most creators rush through configuration and discover problems only after students complain, so you want to approach this step methodically rather than treating it as a simple upload task.
Upload content in logical sequence
Start by creating your module structure in your platform before uploading any videos or materials. Build the complete skeleton first so you can see how pieces fit together and identify gaps in your organization. Upload content one module at a time rather than dumping everything at once, which lets you catch formatting issues early and maintain consistent naming conventions across all materials.
Follow this systematic upload process:
1. Create all module folders with clear, descriptive titles
2. Add lesson placeholders under each module in teaching order
3. Upload videos for Module 1 and verify playback quality
4. Attach downloadable resources to appropriate lessons
5. Add lesson descriptions that preview what students will learn
6. Test navigation between lessons before moving to Module 2
7. Repeat for remaining modules, checking consistency
Configure essential platform settings
Your platform settings control how students experience your course from enrollment through completion. Enable progress tracking so students see their advancement through modules, which provides motivation to continue. Configure your drip schedule if you want to release content gradually rather than all at once, though most students prefer immediate access to everything they purchased.
Adjust these critical configuration options:
- Set course privacy to private until you finish testing completely
- Enable or disable comments based on how much interaction you want
- Configure certificate requirements and customize the certificate template
- Set completion criteria for each lesson (viewed, time spent, assessment passed)
- Choose whether students can skip ahead or must complete lessons sequentially
Students abandon courses when navigation feels confusing or settings create unexpected barriers, so test your configuration from a learner’s perspective before launch.
Test the complete student journey
Create a test account and enroll yourself as a student to experience exactly what your buyers will encounter. Click through every lesson, download every resource, and complete every assessment to verify that nothing breaks or confuses. Ask a trusted friend who knows nothing about how to create an online course to test your materials and note where they get stuck or confused.
Run through this comprehensive testing checklist:
- Enroll using the test account and verify email confirmations send properly
- Access the course on desktop, tablet, and smartphone to check responsive design
- Play all videos to confirm they load quickly and display correctly
- Download all resources to ensure links work and files open properly
- Complete all assessments and verify scoring works as expected
- Test the certificate generation by finishing the entire course
- Check that progress tracking updates accurately as you advance
Step 8. Launch, market, and enroll learners
Your course sits ready in your platform, but students won’t discover it without deliberate promotion that drives traffic to your enrollment page. Launch strategy determines whether your course generates immediate sales or sits empty for months while you wonder what went wrong. You need to treat your launch like a coordinated campaign with specific tactics that build momentum rather than hoping organic discovery will fill your enrollment.
Build pre-launch momentum with your audience
You want interested buyers waiting when you open enrollment rather than scrambling for attention after launch. Start collecting email addresses two to four weeks before your launch date by offering a free preview lesson, checklist, or guide related to your course topic. Send this audience three to five emails that preview course content, share student transformation stories, and explain exactly who benefits from your teaching.
Create this pre-launch email sequence:
Email 1 (Day 1): Deliver your free resource and explain the problem it solves
Email 2 (Day 4): Share a case study showing results your method achieves
Email 3 (Day 7): Preview one module from your upcoming course
Email 4 (Day 10): Announce launch date with early-bird discount details
Email 5 (Launch Day): Open enrollment with time-limited pricing
Building an email list before launch converts at 3% to 8% compared to cold traffic converting at 0.5% to 2%, making pre-launch audience building your highest-leverage marketing activity.
Execute your launch campaign across multiple channels
Your launch needs consistent visibility across platforms where your target students spend time, not just a single announcement that disappears. Post daily content for the first week that addresses common objections, showcases student wins, and demonstrates your teaching approach through free valuable content. Focus on two to three channels rather than spreading thin across every platform.
Implement these proven launch tactics:
- Host a free live workshop that naturally leads to your paid course enrollment
- Partner with complementary course creators for cross-promotion to their audiences
- Create short video clips from your course content for social media teasers
- Answer related questions in online communities with helpful responses (not sales pitches)
- Run targeted ads to your pre-launch email list and lookalike audiences
Convert visitors into enrolled students
Your sales page needs to answer objections before they form and provide clear next steps for enrollment. Structure your page with a compelling headline that speaks to the transformation students achieve, followed by course outcomes, your relevant credentials, module breakdown, pricing options, testimonials if available, and money-back guarantee. Test different price points with your first cohort because pricing flexibility matters more than perfection when you learn how to create an online course that sells.
Include these essential sales page elements:
- Video introduction where you speak directly to your ideal student (2-3 minutes)
- Bulleted list of specific skills students will master
- Module-by-module breakdown showing the learning path
- FAQ section addressing timing, prerequisites, and refund policy
- Single prominent enrollment button that appears multiple times on the page
Step 9. Measure results and improve at scale
You need to track specific metrics that reveal whether your course delivers the results you promised and where students struggle most. Most creators check enrollment numbers and stop there, missing the critical performance data that separates courses students love from courses they abandon. When you understand how to create an online course that improves continuously, you build measurement into your delivery system rather than treating analytics as an afterthought.
Track core performance metrics
Your platform provides default analytics that show surface-level data, but you need to dig deeper into metrics that predict student success and course profitability. Focus on the three to five numbers that directly impact your business goals rather than drowning in dozens of vanity metrics. Check your dashboard weekly during your first three months, then shift to monthly reviews once you identify stable patterns.

Monitor these essential performance indicators:
Enrollment metrics:
- Total enrollments (daily, weekly, monthly)
- Conversion rate from page visit to purchase
- Average time from first visit to enrollment

Engagement metrics:
- Course completion rate (percentage who finish)
- Average time to complete the full course
- Lesson completion rate by module
- Drop-off points where students stop progressing

Revenue metrics:
- Total revenue and average order value
- Customer acquisition cost per enrolled student
- Lifetime value if you offer multiple courses
Analyze completion and engagement patterns
Look for the specific lessons where completion rates drop sharply because these spots reveal content problems you need to fix. Students who complete 80% or more of your course generate better testimonials and referrals than those who finish only 30%, so improving completion directly impacts your marketing effectiveness. Run a monthly audit that identifies your three weakest lessons based on completion data and student time spent.
Students who complete your course become your most valuable marketing asset, making completion rate optimization more important than acquiring new enrollments.
Gather actionable student feedback
Send a brief survey to students at the 50% completion mark and again when they finish the entire course. Ask specific questions about clarity, pacing, and practical application rather than general satisfaction ratings. Your mid-course survey catches problems while students still remember them, giving you real-time insight into what needs immediate improvement.
Structure your feedback surveys with these targeted questions:
- Which lesson provided the most immediate value? (helps you identify what to promote)
- Where did you get confused or stuck? (reveals content gaps or unclear explanations)
- What topic deserves more depth or examples? (guides your bonus content creation)
- How quickly did you see results applying this material? (validates your transformation promise)
Iterate based on data insights
Schedule quarterly content updates that address the top three student complaints or confusion points your data revealed. Replace underperforming lessons with improved versions, add supplementary resources where students request more depth, and update examples that no longer resonate with your audience. Track whether your improvements increase completion rates before and after each update to verify your changes actually work.
Start building your course now
You now have a complete framework for how to create an online course that students finish and recommend to others. The nine steps you walked through eliminate guesswork and help you avoid the mistakes that cause most courses to fail. Your success depends on execution consistency rather than perfection, so start with step one today rather than waiting for ideal conditions that never arrive.
Your course platform choice determines how smoothly you deliver content and track student progress at scale. Professional learning management systems provide the infrastructure you need for reliable video hosting, progress tracking, assessments, and certificates without technical headaches that pull focus away from teaching. Organizations using dedicated LMS platforms report higher completion rates and better student outcomes compared to those cobbling together multiple tools.
Ready to see what a robust course delivery system looks like in action? Take our LMS readiness quiz to identify exactly where you are in the process and what capabilities you need most for your specific situation.